This articles explains how to set up the TimeXtender Dynamics 365 Business Central - Online and TimeXtender Dynamics 365 Business Central - SQL Server data sources. Unlike other Business Central 365 data sources, these new data sources provide features that make working with Dynamics 365 Business Central ("BC", formerly known as "Dynamics NAV") much easier. In a BC database, all accounts, also known as "companies", have their own set of tables. When data is extracted using the TimeXtender Dynamics 365 Business Central - Online and TimeXtender Dynamics 365 Business Central - SQL Server data sources, accounts "share" tables so that tables do not have to be manually merged in your prepare instance. Furthermore, the accounts to extract data from can be specified, which avoids the need to later on filter out other unwanted account data in your prepare instance. Option Values are also included as part of the tables in these new data sources.
In the Environment field, enter the name of the environment to connect to. “Production” is the default value. In order to see your available environments, navigate and login to https://businesscentral.dynamics.com, and click on Environments.
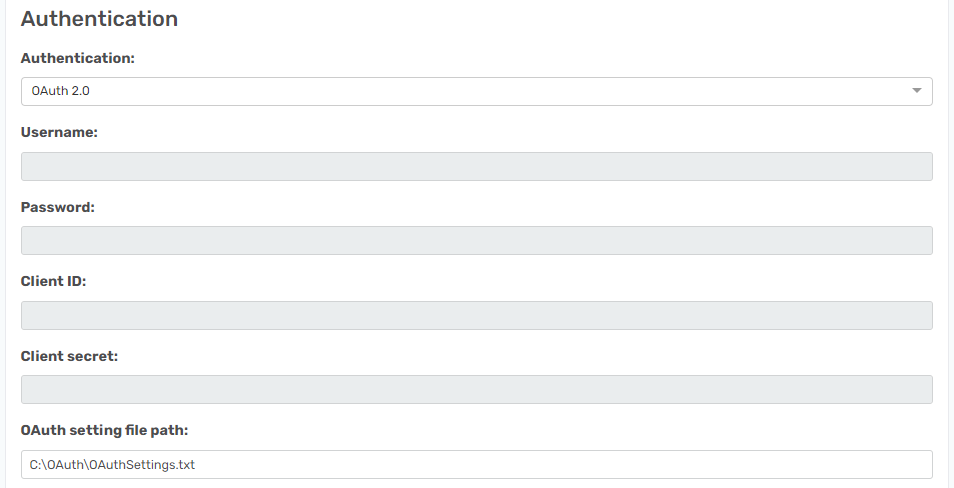
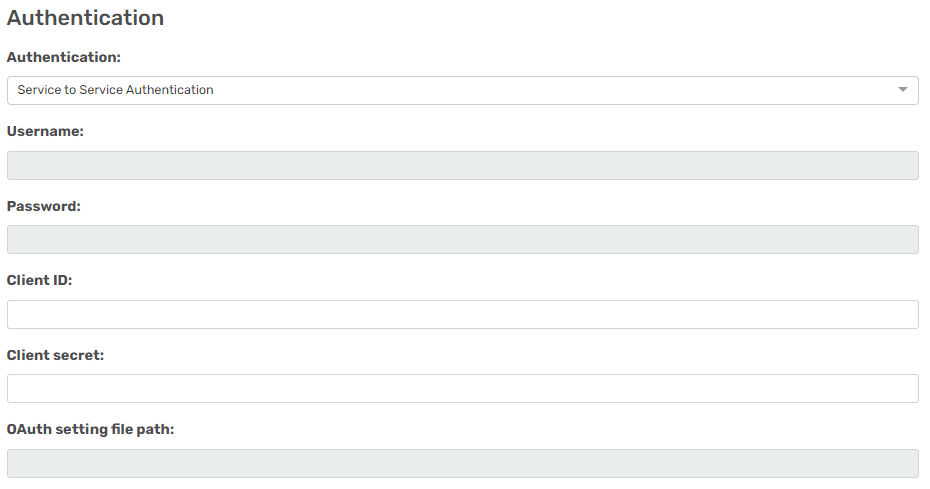
Select OAuth 2.0 or Service to Service Authentication as the authentication method.
To use OAuth 2.0, add a OAuth setting file path to store the token in. For example, “C:\OAuth\OAuthSettings.txt”.
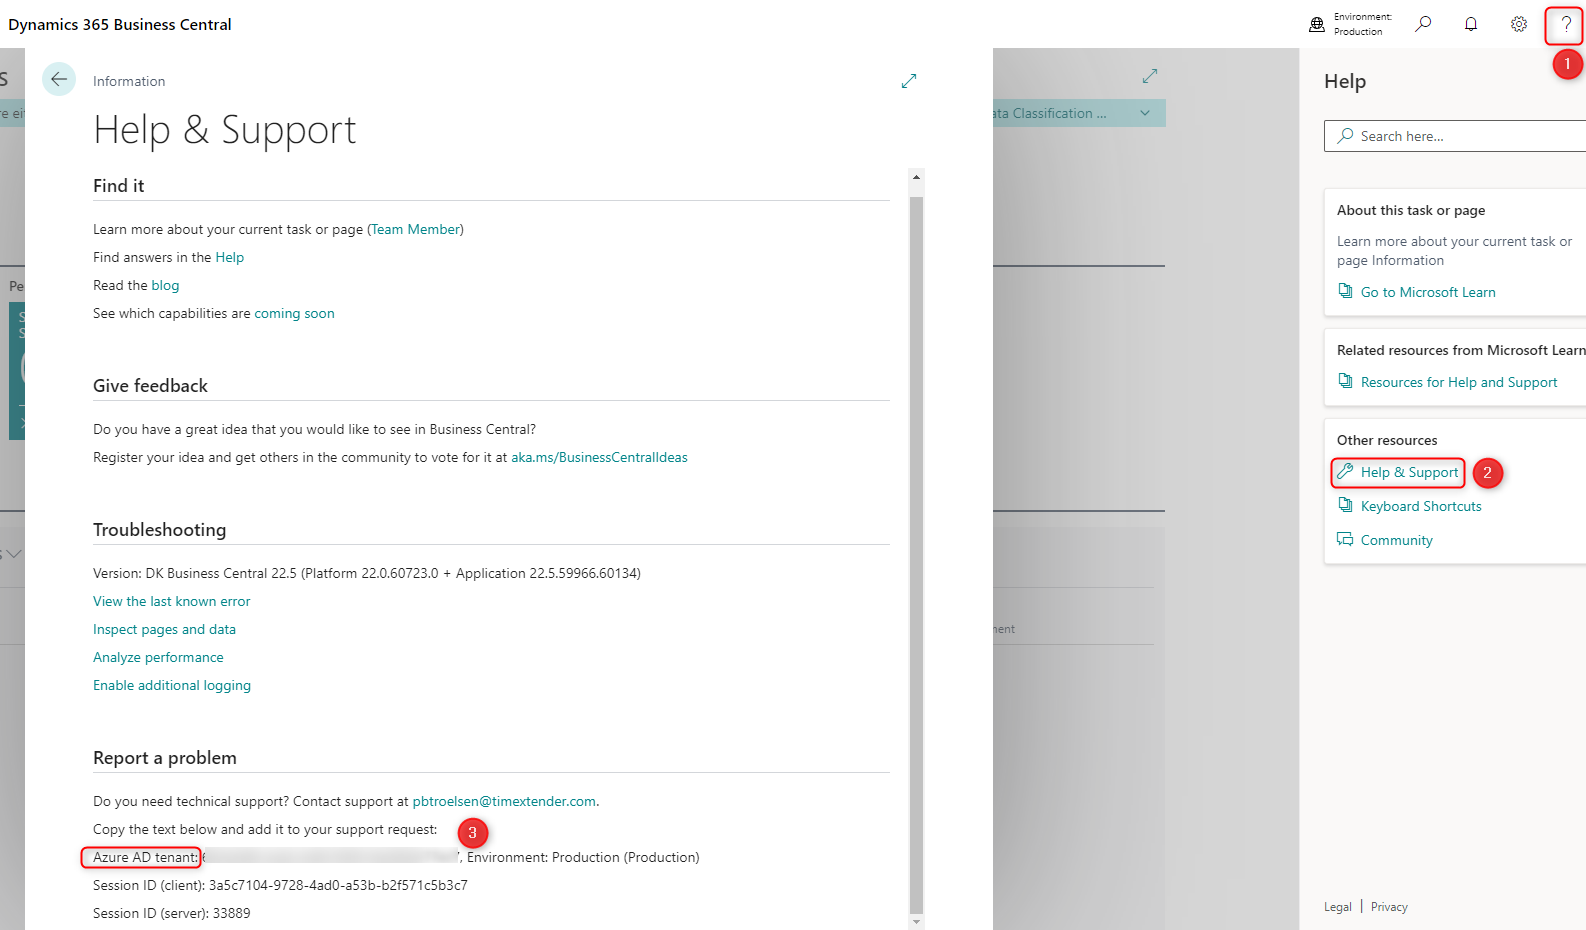
To use Service to Service Authentication, add a Application (Client) ID and Client Secret for the Azure app registration.
For TimeXtender Dynamics 365 Business Central - SQL Server:
Set it up like a normal SQL data source by adding the name of the server where the database resides in.
Enter the name of the database.
Check the Trust server certificate checkbox.
Select SQL Server Authentication or Active Directory Password Authentication as the Authentication method. Specify the username and password.
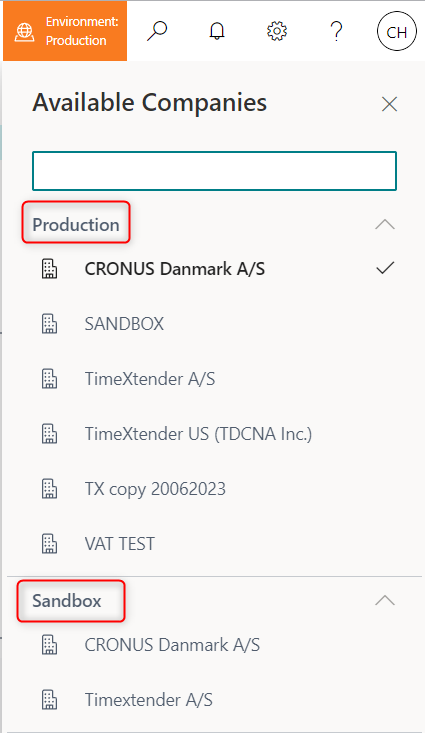
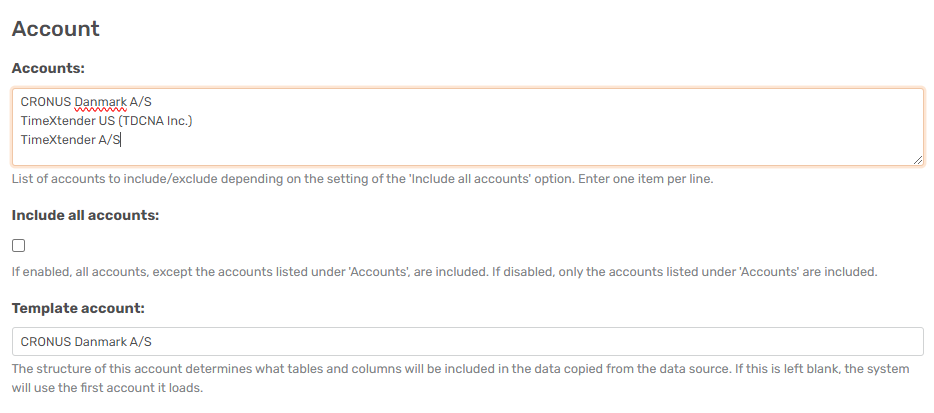
The “Accounts” box can either be used to include or exclude accounts, depending on whether the “Include all accounts” box below is checked or not. When this box is checked, then all of the accounts will be included except for those that are listed out in the “Accounts” box.
Conversely, If you want to explicitly define which accounts to include, clear the Include all accounts checkbox. The accounts listed in the Accounts box will then be included, rather than excluded. If the Accounts field is empty and the “Include all accounts” checkbox is checked then all accounts will be added.
In the Template account box, enter the name of the account that has the structure you want to use. This account determines the tables and fields that will be copied from the source.
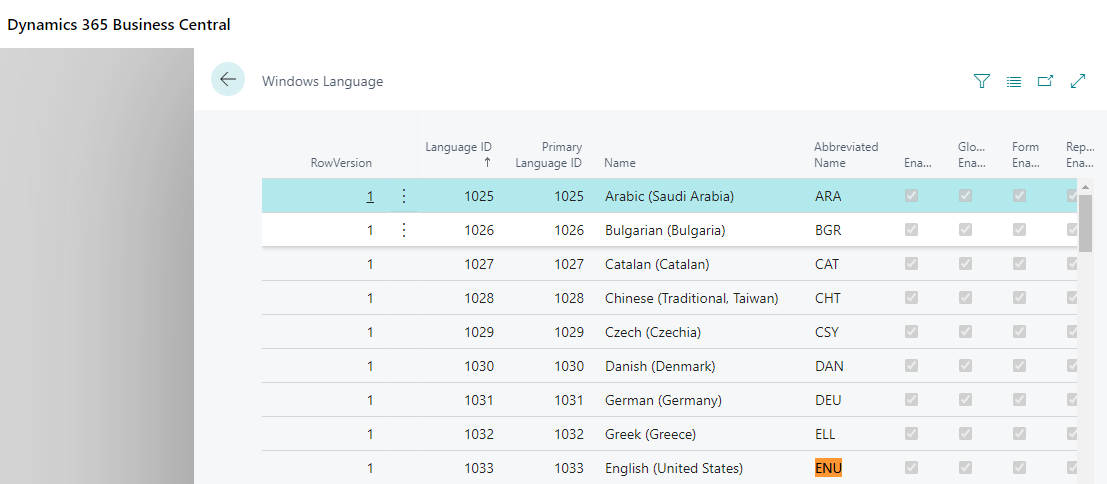
In the Translation box, enter the three-letter abbreviation for the translation to be used. The translation determines the language used for the table and column names when they are copied from the source. When this field is blank, the default of "ENU" will be used. To see the full list of available languages for the online version, navigate to https://businesscentral.dynamics.com/?table=2000000045
Under Advanced Options, the provider behavior can be fine-tuned. Note that the available options depend on the selected provider type (i.e. SQL Server or Online).
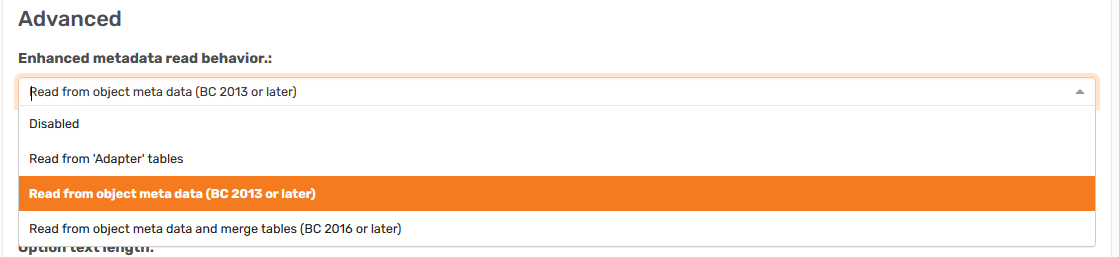
Enhanced metadata read behavior. Select how the adapter should read option values and other metadata. The settings are: Disabled, Read from 'Adapter' tables, Read from 'Objects' (BC 2013 or later), Read from 'Objects' and merge tables (BC 2016 or later). This property only applies to the SQL Server provider.
Disable option tables: If this option is checked, the tables generated by the adapter that contain option values, e.g. "Item Ledger Entry.Document Type", will be excluded from the data copied from the source.
If the Metadata read behavior is set to Disabled, then the tables generated by the adapter that contain option values will be excluded, even if the “Disable option tables” is unchecked.
Option text length:The maximum length of an option text in the option tables. Increase this if the length is too short for the data in your system.
Include SIFT tables/views:If enabled, the SumIndexField Technology ("SIFT") tables/views are included in the data copied from the data source. This property only applies to the SQL Server provider.
Read invalid identifiers: If enabled, the characters that cannot be used in object names are read from the source. The system uses this to resolve the name of objects in the database by replacing invalid characters with "_". This property only applies to the SQL Server provider.
Invalid identifiers: A list of characters that cannot be used in object names. If Read invalid identifiers is enabled, then this option is ignored. This property only applies to the SQL Server provider.
Allow dirty reads: If enabled, tables will not be locked before data is read from them. This property only applies to the SQL Server provider.
Click Add to save the data source
Add the Data Source
Open TimeXtender Data Integration (TDI) and then open the Ingest instance. Right-click on data sources and select Add Data Source...
Provide a Name for the data source and click Next.
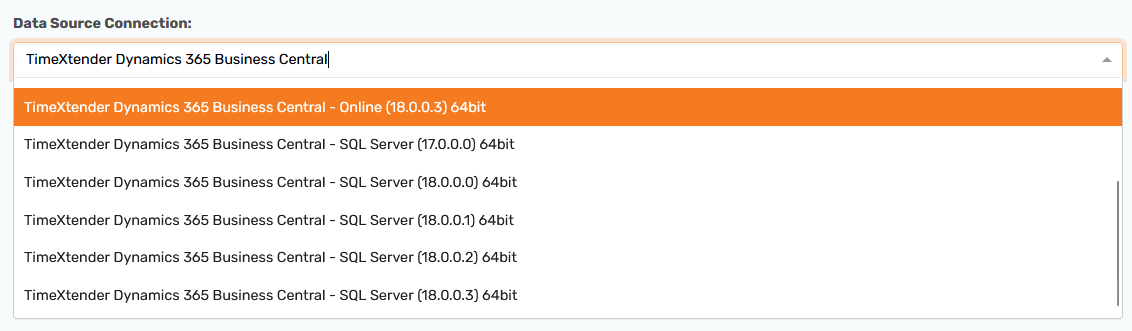
Select the BC data source connection that was setup in the Portal and click Next.
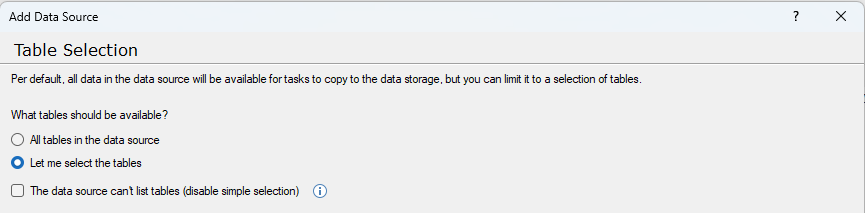
Choose whether to extract all tables or specify the tables to be included.
Choose All tables in the data source to extract all tables and click Next. If you are using the Online provider and OAuth authentication, then OAuth needs to be authorized in TDI. When the data source has been added, right-click on the data source and select Edit Data Source, and then click the Authorize OAuth button to authorize your connection
Choose Let me select the tables to extract specific tables and click Next.TDI will automatically attempt to authorize OAuth when using the Online provider and OAuth authentication. The “Log in as a specific user” popup may be displayed, and ultimately the Azure app registration will be allowed to gain access to Business Central.
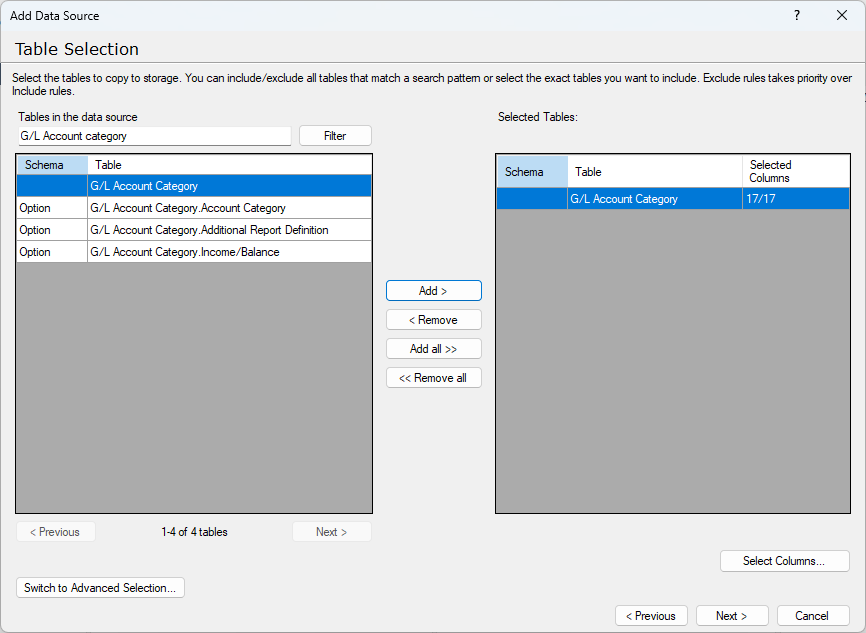
Search for a table and add it, such as G/L Account Category
Note: The schema of the option tables is set to Option
Select the columns to include using Select Columns…
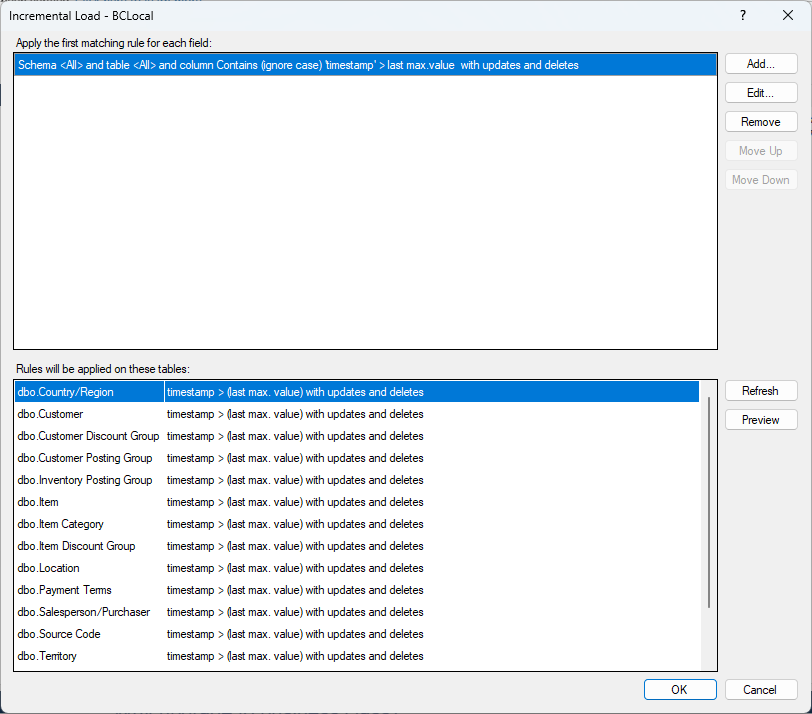
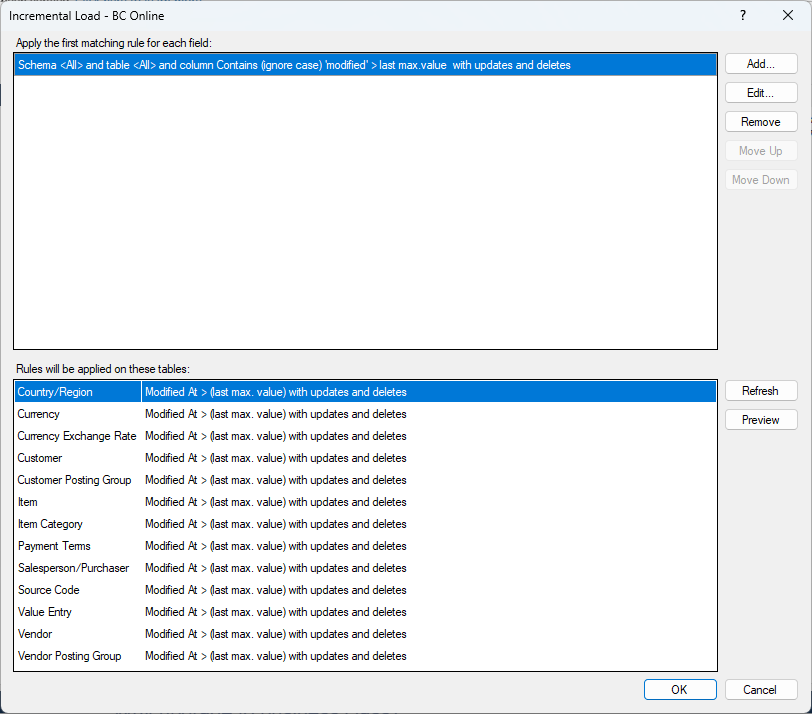
Set up Incremental Load. The best field to use for this is the timestamp field if it exists. or the Modified At field
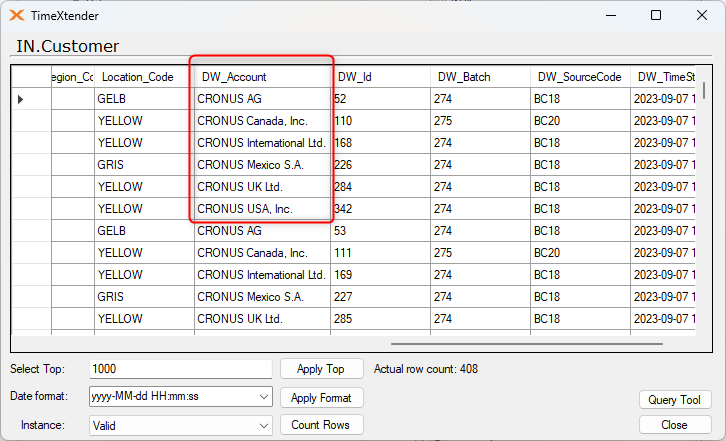
Transfer the tables from the Ingest data source to your prepare instance Preview a table to see the included accounts, which are specified in the DW_Account field