
Relates to TimeXtender 6024.1 and later versions
The Prepare instance is the area in TimeXtender Data Integration where you map data from your Ingest instance, then cleanse, transform, and consolidate this data into a "single version of truth" in your data warehouse. TimeXtender supports various Storage Types depending on your use case, which you will configure in the steps below.
Add a Prepare Instance
To create a Prepare Instance, in the TimeXtender Portal go to Data Estate > Instances, click Add Instance > Add prepare instance.
General
- Type a friendly Instance name you want to appear in the portal and TimeXtender Data Integration
- Type an optional Instance description to provide additional context. Consider including the intended storage type and/or environment name
- Log Retention Days box, adjust the number of days execution logs should be kept
- Enable Team Development if you want to allow multiple developers to access the instance at the same time
- Select the Server storage type you plan to use
Note: all connection credentials are protected with 256 bit AES encryption
SQL Server storage
- In the Server name box, type the name of the server that you want to store the database on. If it is a named instance, type the server name and the instance name.
- In the Database box, type the name of the database you want to create.
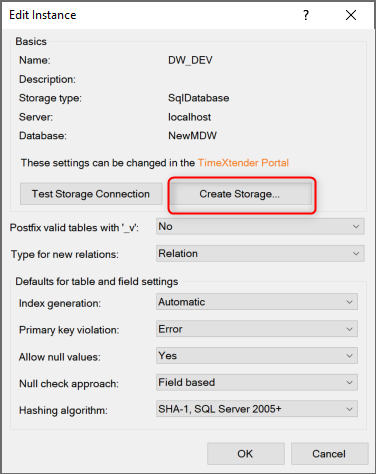
- TimeXtender will create this Database for you, later in the Desktop click Edit Instance... and click Create Storage… See below
- In the Authentication list, click the mode of authentication you want to use. You have the following options:
- Windows Authentication: Use the logged-in Windows user's credentials for authentication.
- SQL Server Authentication: Use a login set up on the SQL Server. Enter the username and password in the corresponding fields.
- Azure AD Password Authentication: Use Azure AD credentials from a domain that is not federated with Azure AD. Enter the username and password in the corresponding fields.
- Azure AD Integrated Authentication: Use the logged-in Windows user's credentials for authentication, provided that he is logged in using Azure AD credentials from a domain that is federated with Azure AD.
- (Optional) In the Connection timeout box, enter the number of seconds to wait before terminating the attempt to connect to the server. Set it to 0 to wait indefinitely.
- (Optional) In the Command timeout box, enter the number of seconds to wait before terminating a command. Set it to 0 to wait indefinitely.
- In the Batch size box, enter the number of rows to copy when using ADO.net transfer. '0' equals unlimited.
- (Optional) In the Encrypt connection list, you can enable encryption of the connection, which is recommended when you are not in a private network (e.g. when your server is on Azure). You have the following options:
- No: The communication is not encrypted (default).
- Yes: The communication is encrypted. The server's certificate is verified by a certificate authority.
- Yes, trust server certificate: The communication is encrypted. but the server's certificate is not verified. This setting is not recommended for use on public networks.
- (Optional) If you need a connection string with properties not found in the UI, you can enter it in the Additional connection properties box. It will override the data in the other boxes with connection information.
Dedicated SQL Pool Storage
Click here to learn how to Use Azure Synapse Dedicated SQL Pool
Snowflake Storage
Click here to learn how to Use Snowflake Prepare Storage
Transfer from Ingest
In the last section, you can set how data should be copied from Ingest to the Prepare storage.
- In the Technology list, click on the method you want to use for transferring data from the Ingest storage to the Prepare storage.
- ADO.net: The application-native method. This will use the ADO.net framework on the Ingest server to move data.
- Azure Data Factory: Will auto generate and ADF pipeline to transfer the data from the Ingest Server to the Prepare storage.
- This option is recommended if
- A significant amount of data from is transferred from Ingest to Prepare often
- Or, your Ingest server becomes overloaded during transfer
- If you select this, you'll be prompted to enter the connection information to the Azure Data Factory you want to use.
- This option is not currently supported when using Snowflake storage.
- This option is recommended if
Click Save to add your new Prepare instance.
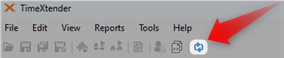
TimeXtender Data Integration can be refreshed to see the latest changes in the portal right away.
Edit a Prepare Instance
In the TimeXtender Portal, click Data Estate-> Instances
- Click on your instance, it will open a page with instance details
- Click on Edit button, edit properties and Save
TimeXtender Desktop can be refreshed to see the latest changes in the portal right away.
Delete a Prepare Instance
In the TimeXtender Portal, click Data Estate-> Instances
- Click on Delete button next to your instance. The Delete dialog will be shown.
- Enter the instance name to confirm, add a comment (reason) and click on Delete
Create Prepare Storage
Before you can deploy and execute tables in a data area within a Prepare instance, you must create the data storage.
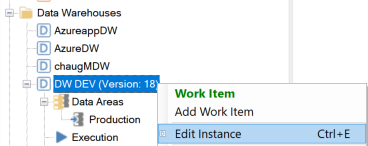
- In TimeXtender Data Integration, right-click on the instance and select Edit Instance.
- Click Create Storage... TimeXtender will run the necessary scripts to create a database with the given name.