


TimeXtender Orchestration & Data Quality can easily import CSV files through the DataTransfer functionality. Here are some tips and tricks. If you have a CSV that needs regular import into a SQL Server database, the DataTransfer package type can be used to automate that task.
Create a DataTransfer
For a simple CSV that needs importing the tasks are as follows:
- Create a new Package of type Data Transfer
- In the Source pane select PowerShell as a Data Provider and enter the following script
Import-Csv -Path 'C:\path\filename.csv'
- Click Preview
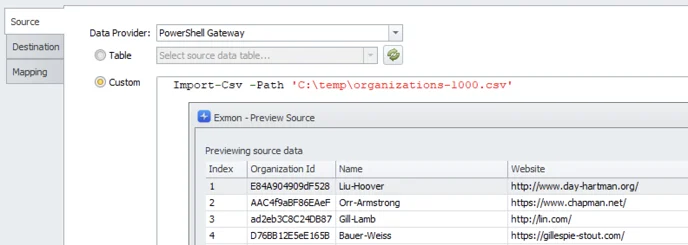
- In the Destination pane select or create the destination table and in the Mapping pane map the CSV columns to the SQL columns.
- Save, run and verify that the data is transferred
Tips & tricks
- If your service is running in the cloud, Import-Csv in only available through Gateways. Install TimeXtender Gateway on a machine and create a PowerShell data provider within the Gateway, and finally select that Data Provider
- DataTransfer doesn't support column headers containing periods (.) in column names. You can rename the column headers as part of the script as follows:
-
# read the file contents
$content = Get-Content -Path 'C:\temp\organizations-1000.csv'
# Remove . in column headers
$content[0] = $content[0].Replace(".","_")
#return objects
$content | ConvertFrom-Csv
-
- You can select specific columns from the CSV file and filter the results with Select-Object and Where-Object functions. Here is an example to only select the Index, Name and Country columns and only return the entries from Finland
- Import-Csv -Path 'C:\temp\organizations-1000.csv' | Select-Object Index,Name,Country | Where-Object -Property Country -eq "Finland"
- If the CSV file doesn't contain column headers you can add them as part of the Import-Csv or ConvertFrom-Csv function
-
Import-Csv -Path 'C:\temp\organizations-1000.csv' -Header "Index", "Organization Id", "Name", "Website", "Country", "Description", "Founded", "Industry", "Number of employees"
-
