
Released in TimeXtender Data Integration 6024.1
This article describes how to deploy and execute the Deliver instance to the Power BI Premium XMLA Read/Write Endpoint.
Configure Power BI
- Login to app.powerbi.com
- Select the workspace where the Deliver instance will be deployed to:
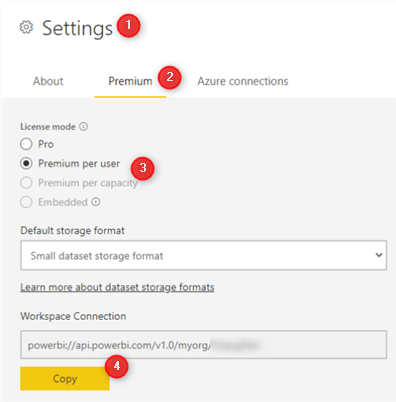
- Go to Workspace Settings
- Click the Premium tab
- Select the Premium per user or Premium per capcity License mode (this requires a Premium license)
- Copy the workspace connection.
- Go to the admin portal

- Under, Premium Per User / Dataset workload settings, Set XMLA to "Read Write".
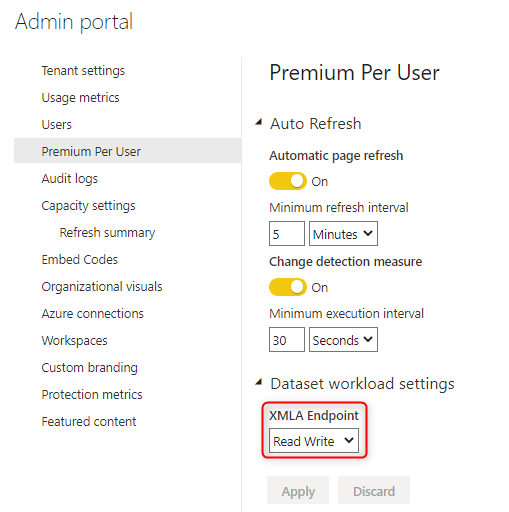
Note: If you are using Fabric Capacity to host your endpoint, this setting can be found under Admin Portal > Capacity Settings > Semantic Models > XMLA Endpoint
Add Power BI Premium Deliver Instance Endpoint
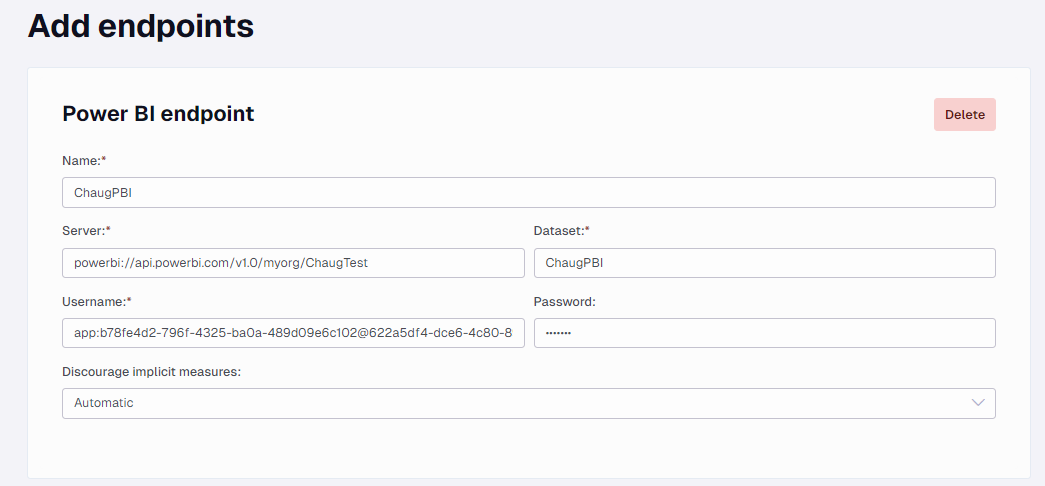
In the Portal, add a Deliver instance, and add a Power BI Premium endpoint
- Name: Give your endpoint a friendly name that will appear in TimeXtender Data Integration.
- Server: paste the Workspace Connection URL copied from the Power BI workspace.
- Dataset: This is the name for the Power BI Dataset,
- Username & Password: The credentials used to log onto app.powerbi.com (i.e. email and password). Alternatively, you can Authenticate using a Service Principal.
- Click Save.
Note: if the endpoint uses data from a Prepare instance with Snowflake storage follow these additional steps.
Deploying the endpoint in TimeXtender Data Integration
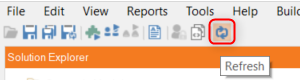
- In TimeXtender Data Integration, click Refresh to show the newly created Deliver instance and endpoint.
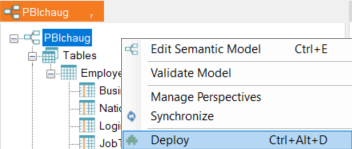
- Right click on the Deliver instance and select Open instance.

- Drag the tables from the Prepare instance into the Deliver instance. Right click on the instance and select Deploy.
Configure the Power BI Data Source Credential
If you receive an authentication error when you first attempt to execute your model, you may need to update your your data source credentials:
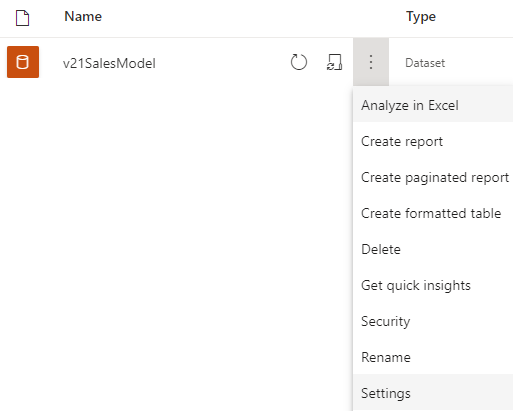
- Go to the Data Model, click the 3 dots, click Settings
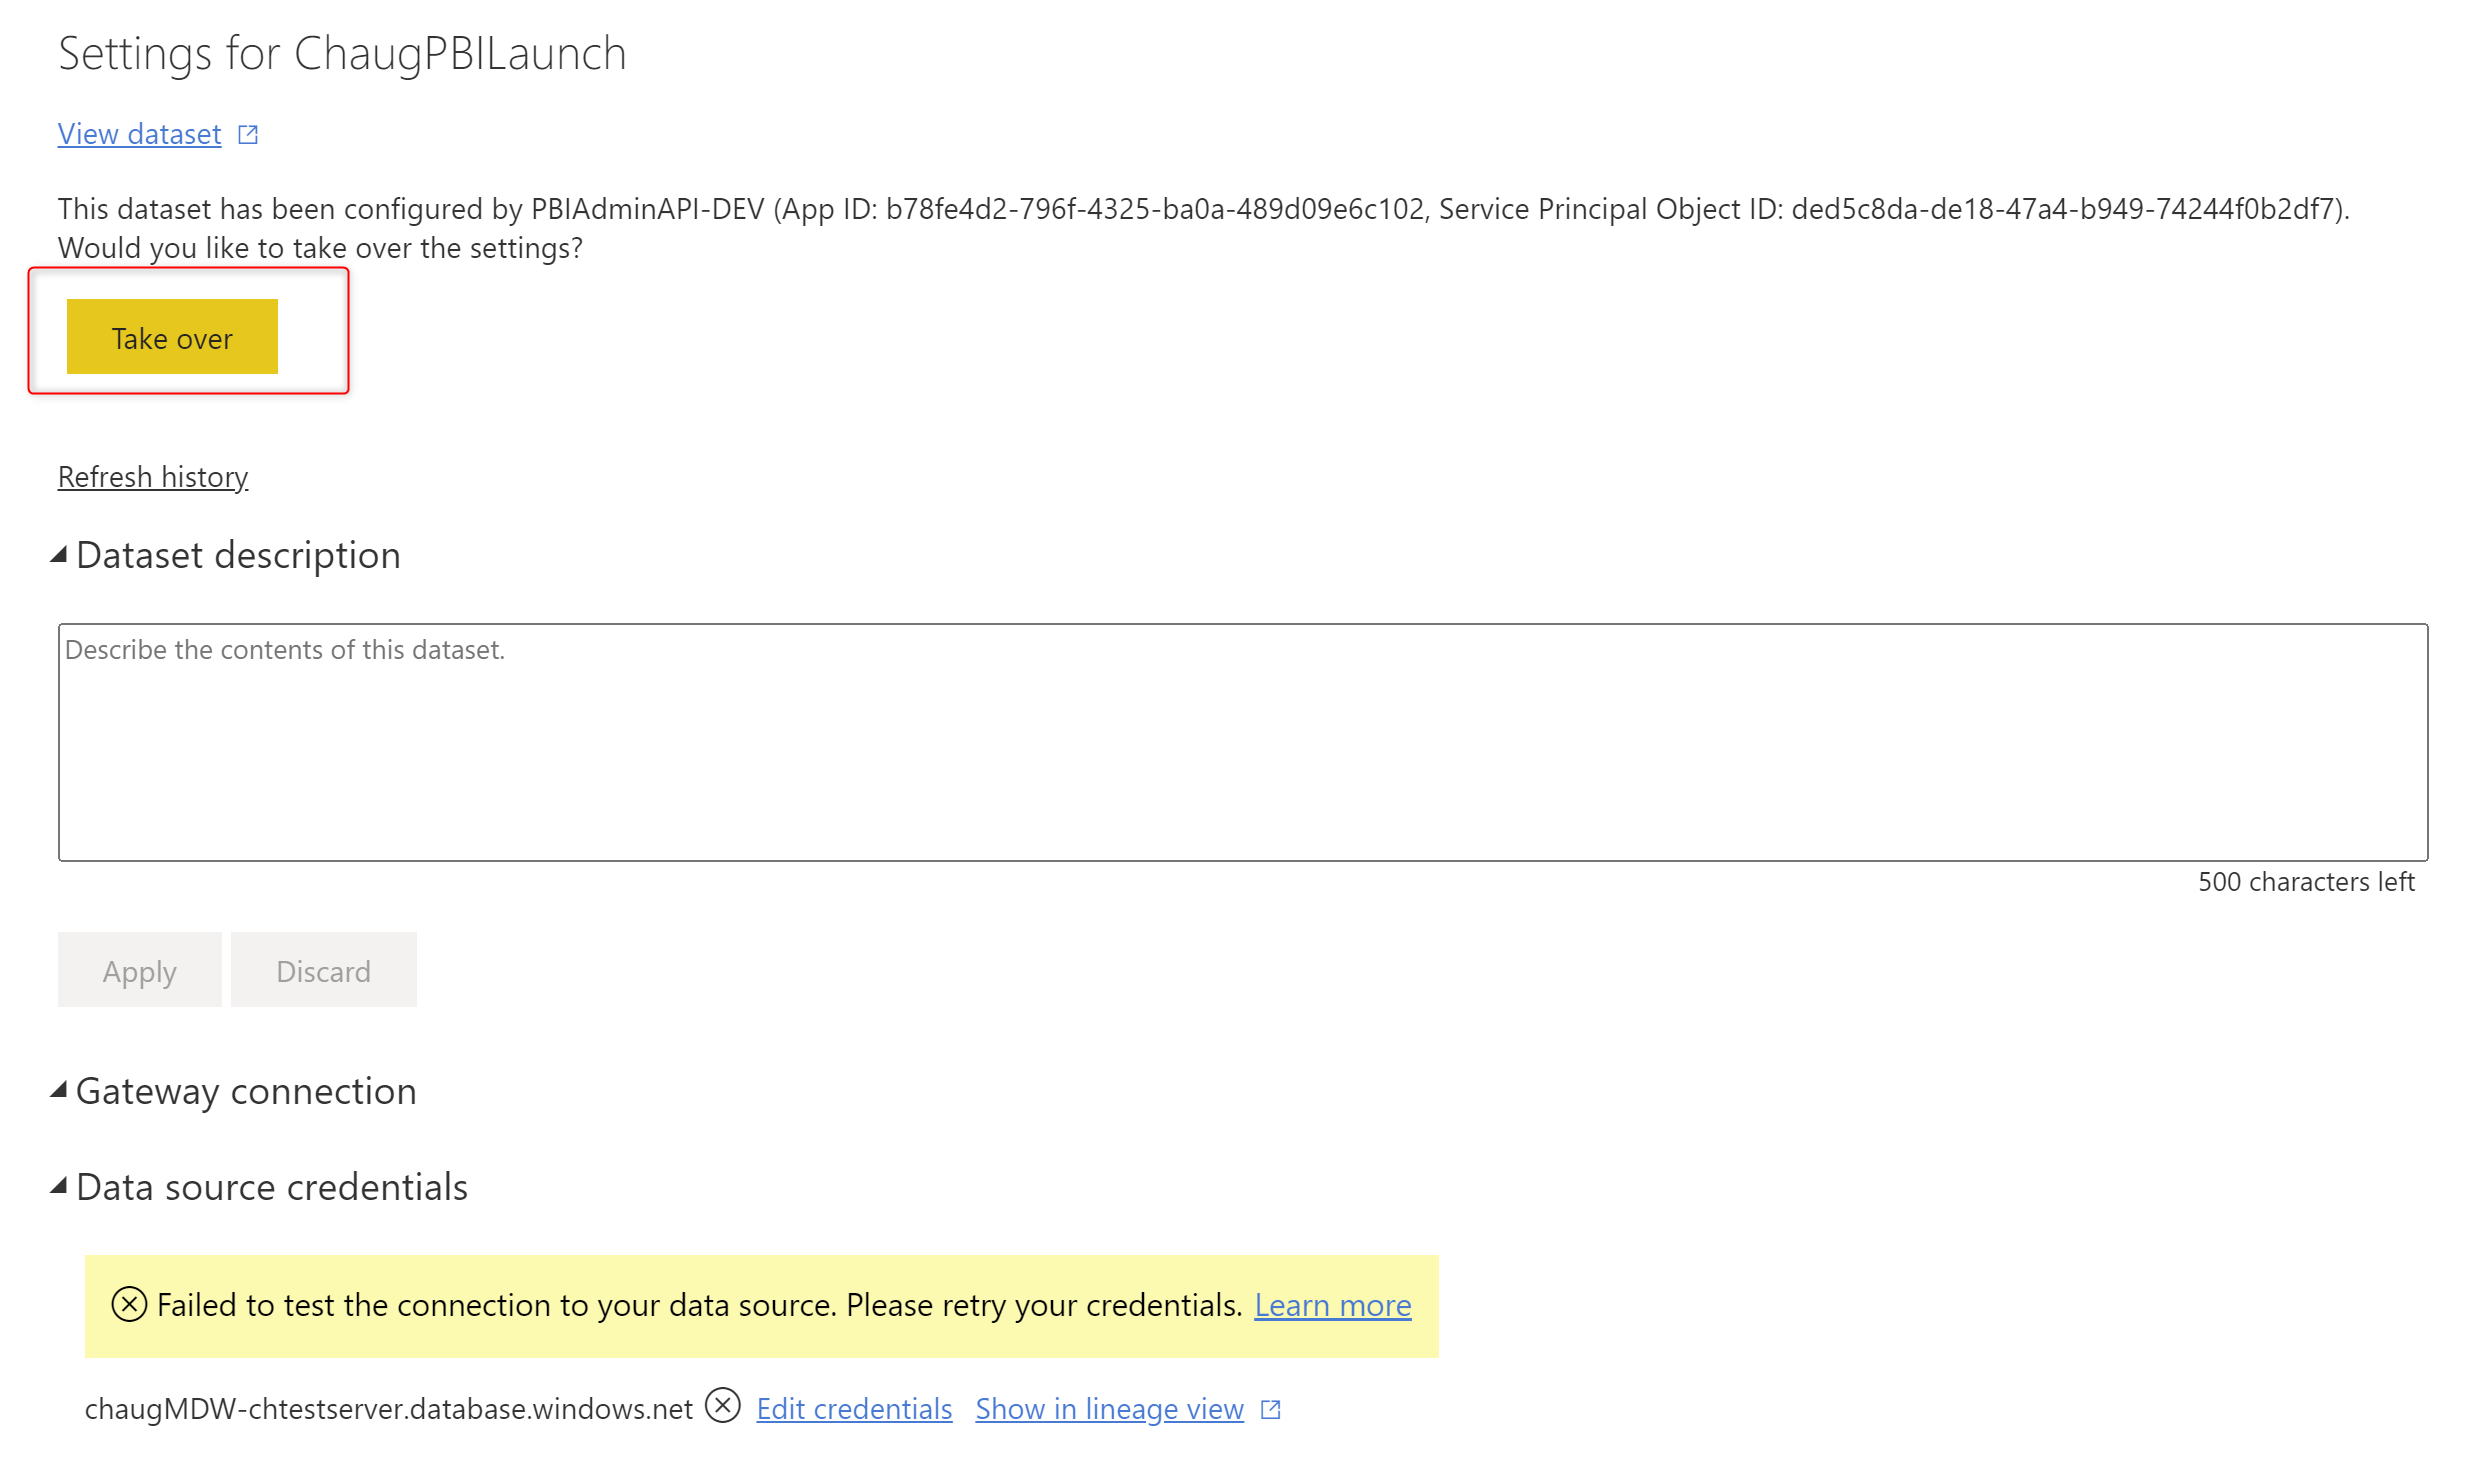
- Under data source credentials, select Edit credentials and enter the credentials for the Prepare instance storage.

- If you are unable to successfully edit the data source credentials, try to take over the dataset settings first and then edit the credentials:
- Go back into TimeXtender Data Integration, right-click on the Deliver Instance and select Execute.
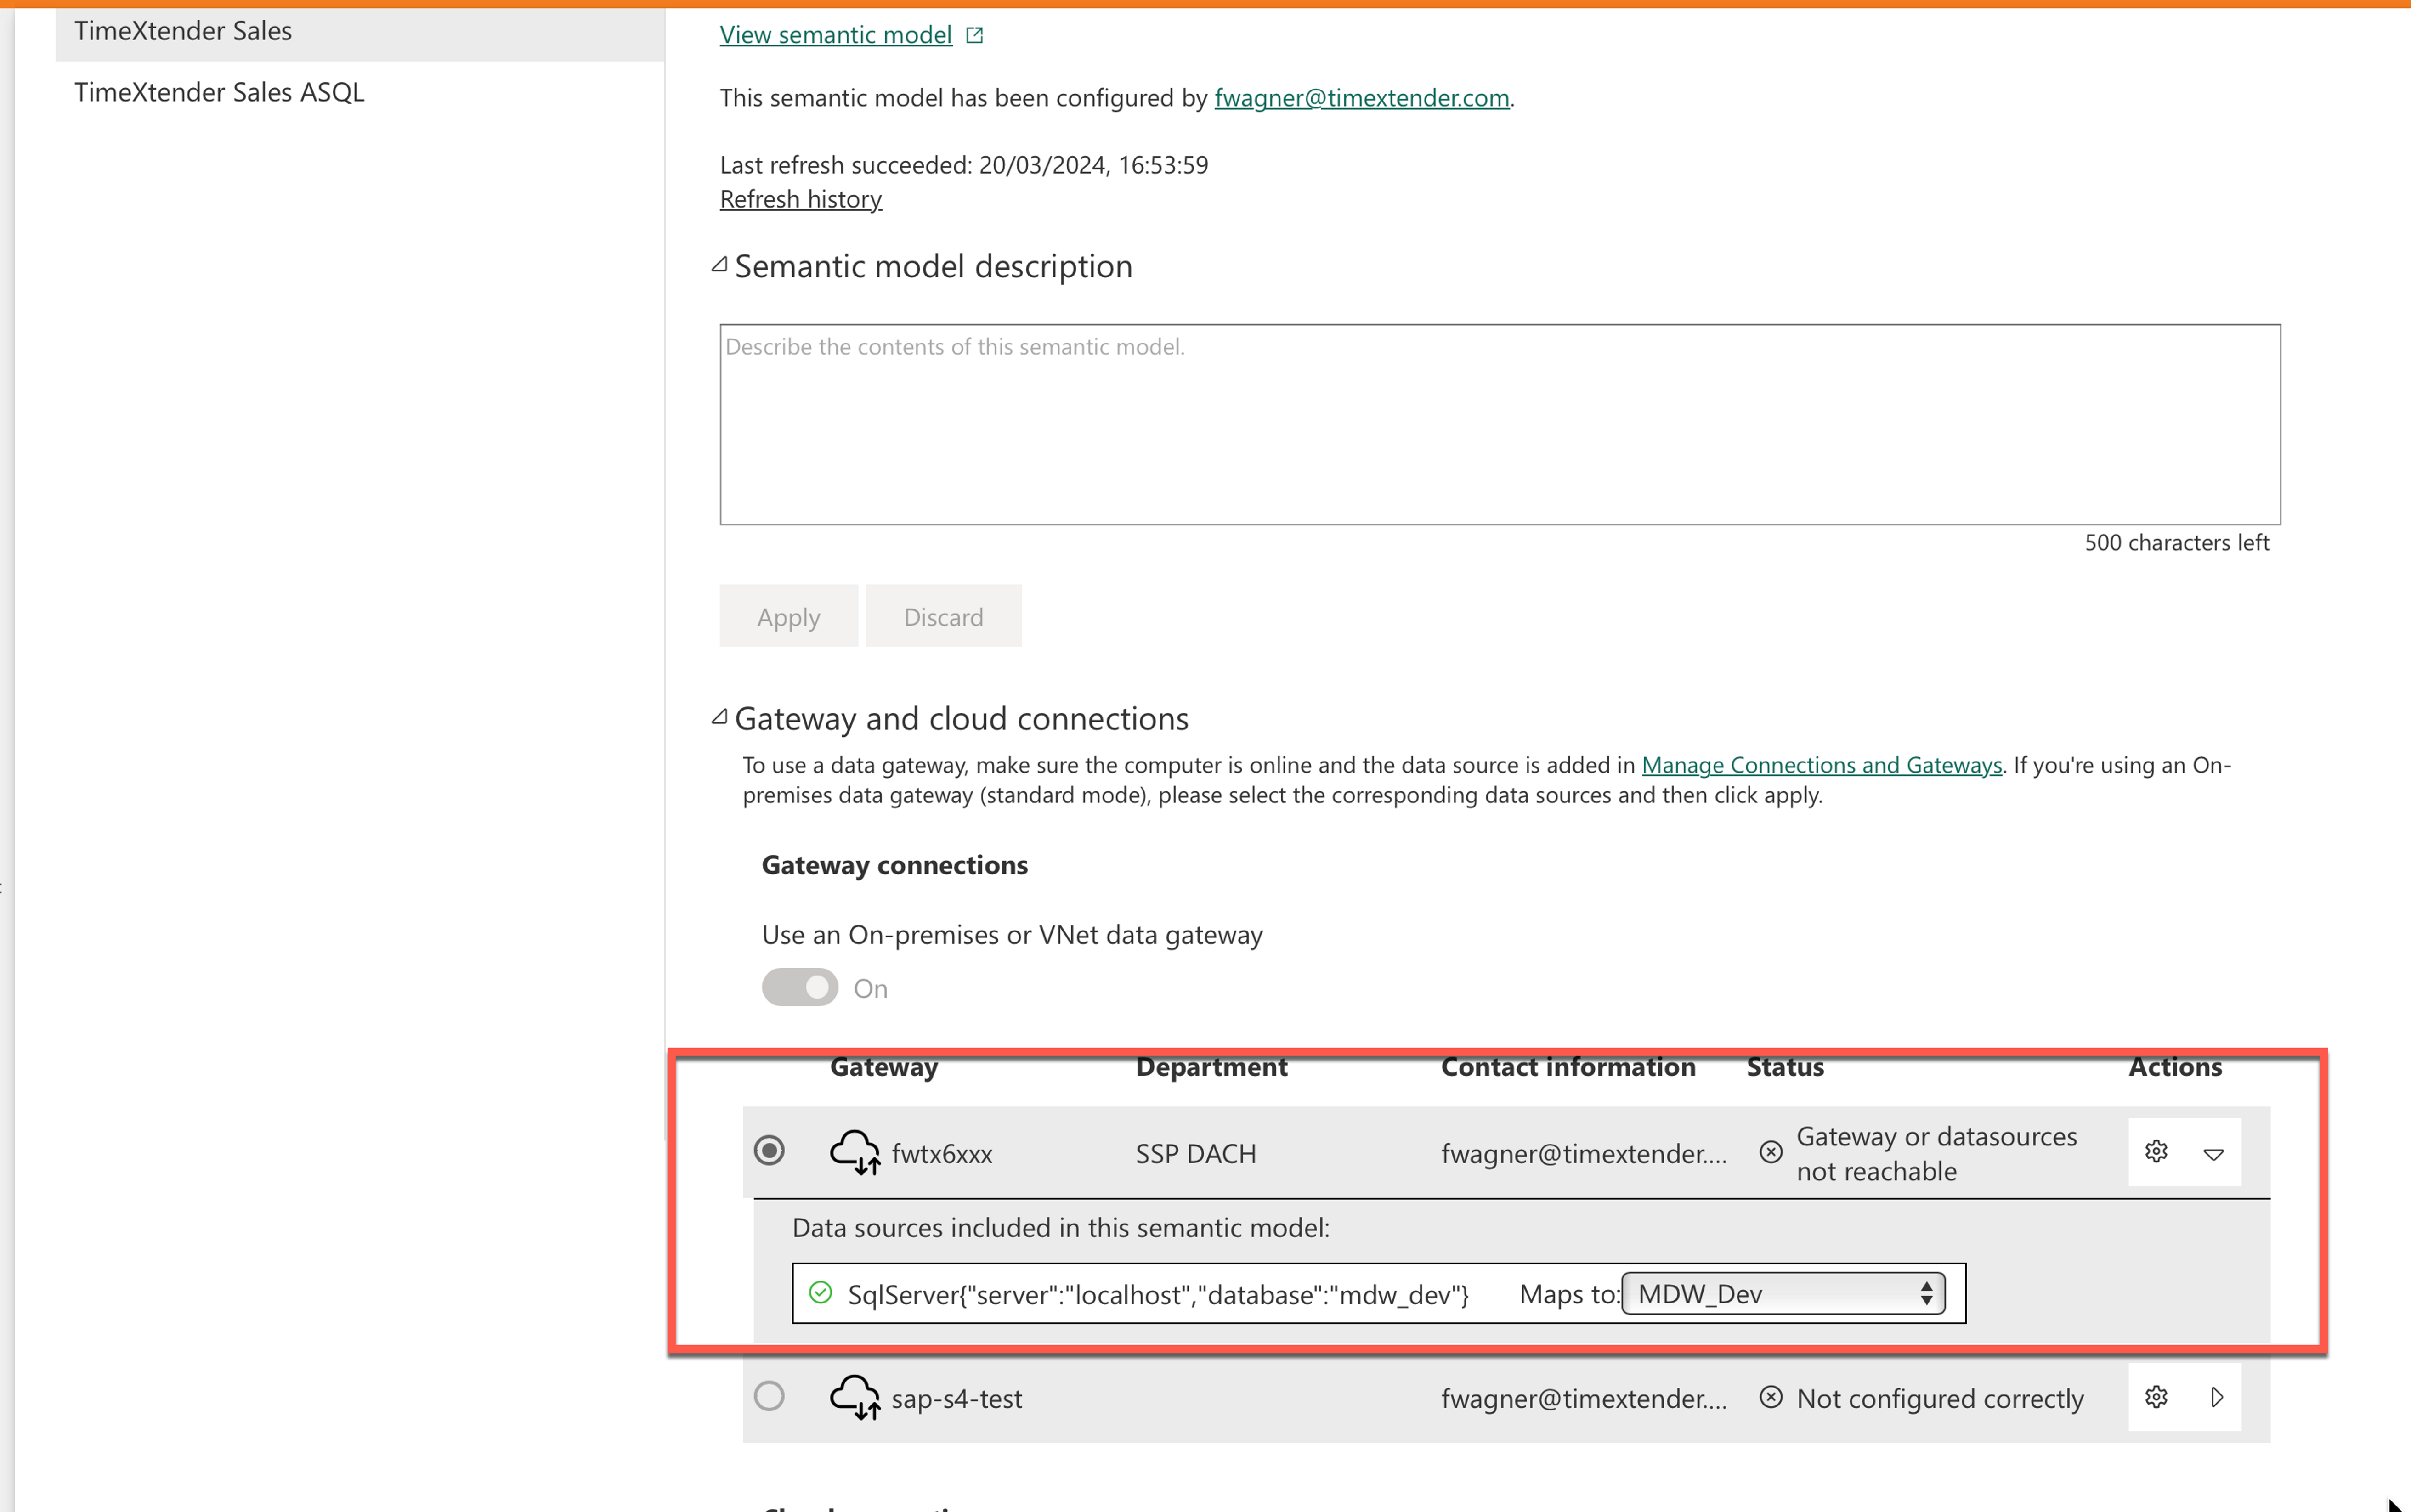
Note: if you are using an on-premise SQL Server storage for the Prepare instance(s), you will have to install the Power BI gateway and choose this gateway in the Power BI service
(Optional) Authenticate using a Service Principal
In order for your Deliver instance executions to not be dependent on the credentials of a single individual you can authenticate to Power BI using an Azure Service Principal or App Registration. Read more about this from Microsoft Docs.
Create an App Registration in Azure
- In the Azure Portal navigate to Azure Active Directory (Take note, of the Tenant ID, this will be used as part of your username later).
- Click App Registrations, click New Registration (Take note of the App ID, this will be used as part of your username later).
- Once App Registration is created, click Certificate & Secrets, New Client Secret (Take note of the client secret, this will be used as your password later).
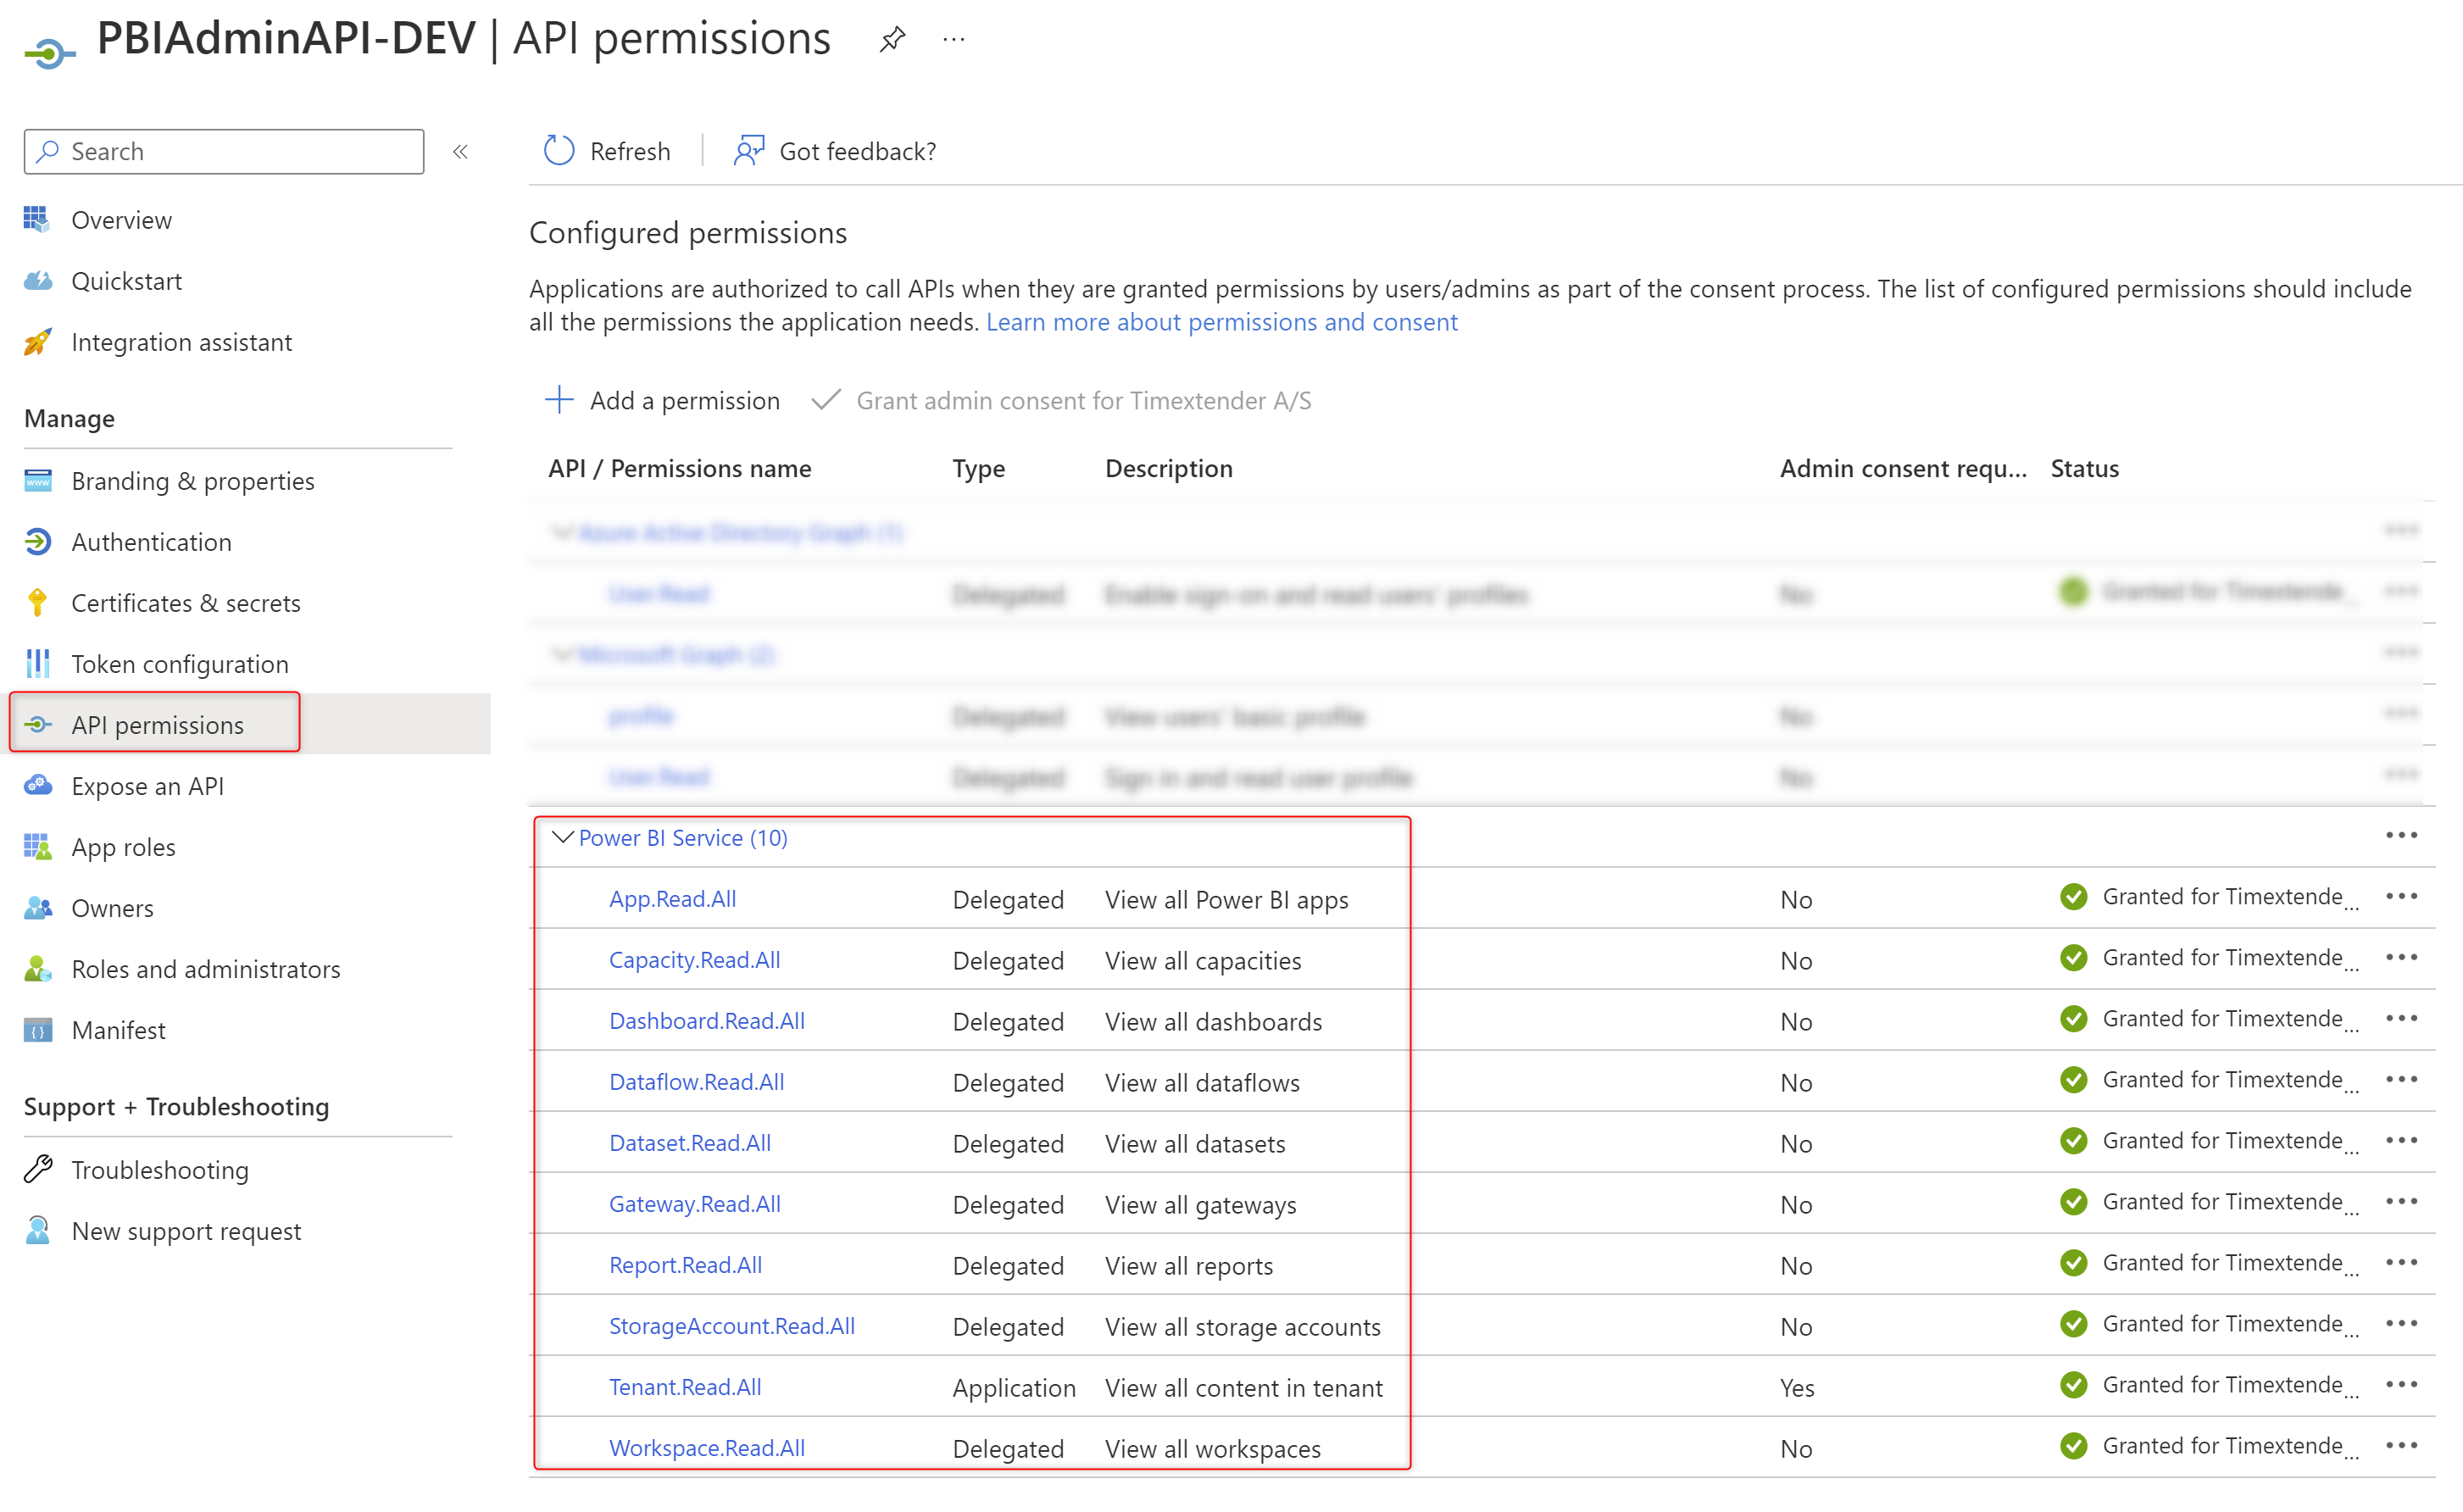
- Click API permissions, Add a permission, then add the below permissions.
Allow service principals to use Power BI APIs
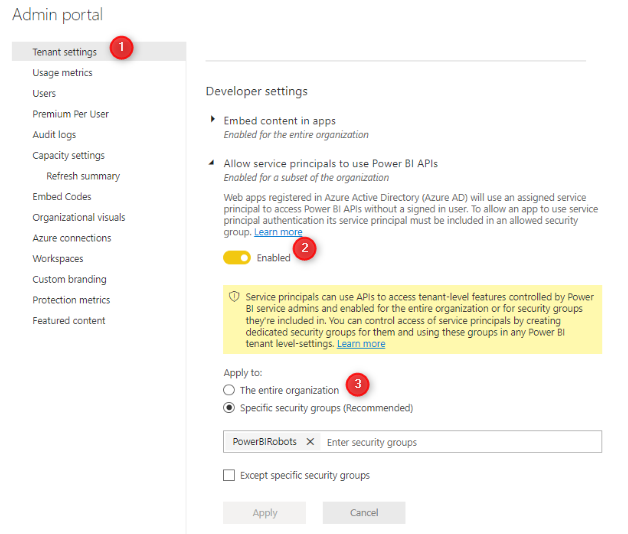
- Navigate to Power BI Admin Portal > Tenant settings
- Enable the option: Allow service principals to use Power BI APIs
- Under Apply to, select The entire organization. Alternatively, Select Specific security groups, and ensure the app registration is added to the defined security group.
Give your App Registration Admin Access
- In Power BI, Open your Workspace.
- Click Access
- Enter the name of the App Registration, Set the role to Admin, then click Add.

Update Credentials in Deliver instance
- Open your Deliver Instance in the Portal, Click Edit.
- Edit the Credentials of your Power BI Premium Endpoint:
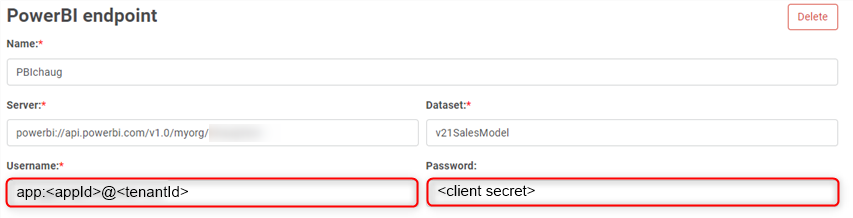
- Username: enter app:<appId>@<tenantId>
- Password: enter the <app client secret>.
- Click Save