This article describes how to add a REST API Endpoint to a Deliver instance. The REST API endpoint works together with a REST API web server installed on a physical or virtual machine to publish data through REST API endpoints. On deployment, the endpoint is marked as deployed. The web server regularly refreshes its configuration and fetches the last deployed version. There is no execution option.
Note: The REST API Endpoint currently only supports tables (i.e. views are not currently supported)
Add a REST API Endpoint
In the TimeXtender Portal, navigate to Data Estate > Instances, click Add Instance and add a Deliver instance
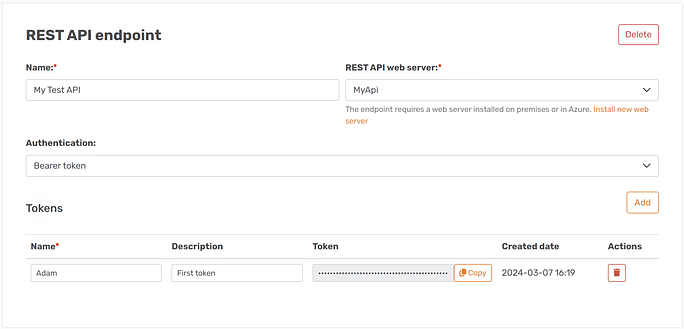
Select REST API endpoint from the Endpoint type list, type a name for the endpoint in the Name box, and then click Add endpoint.
In the REST API web server list, select the server that should publish the data.
In the Authentication list, select the type of authentication you want to use.
None: Everybody will be able to access the data published through the API if they can access the server URL.
Bearer token: The user must provide a token on each request to the API. When you select the option, the first token is created for you. Next, fill in the Name and, optionally, the Description fields. Click Add to add more tokens. The token's value is hidden but you can click Copy to copy it to the clipboard for sharing with users.
OAuth: The user must authenticate using OAuth on the first request in a session. This requires an app registration in Azure - see more below - so you can fill in the following fields:
Tenant ID: Directory (tenant) ID in the app registration
Audience: Application (client) ID in the app registration
Issuer: Dependent on the token version. For version 1 the issuer is ‘https://sts.windows.net/{tenantId}’. For version 2.0 the issuer is ‘https://login.microsoftonline.com/{tenantId}/v2.0’. In both cases, the {tenantId} should be replaced with your tenant ID. To make the REST API hand out tokens in version 2.0 format, update the manifest with: "accessTokenAcceptedVersion": 2.
Click Enable to block access to users that are not in specific roles. The first role is created for you. Next, fill in the Role field with the name of the role. Click Add to add more roles.
Click Save.
Create an Azure App Registration
An Azure app registration is required to use OAuth, which is then used to provide access tokens. To register an app, go to the Azure portal, select App registrations and then select New Registration to register a new app. Give it a name and applicable account support types. After creating the app, go to Expose an API. Add a scope and give it a name and description. After this is done, go to the Overview where you can find the necessary values to enter into the endpoint configuration. To add roles to the app registration (optional), first add the new role under App Roles. Then you need to add a new API permission that uses that role (this can require admin consent).
Getting data from a REST API endpoint
As the name implies, getting data from this endpoint type uses a REST API.
Metadata
This endpoint is used to get information on the tables included in this API. The information includes column information (names and datatypes), table names, and descriptions. This method is called with:
This method has several optional parameters, as described in the table below.
Parameter   Description                                                                                                                                                                                                     Expected Format
$Top        Limits the returned result set to the given number of rows. If no value is specified it defaults to 1000. To return all rows without using pagination, use -1 (this is not recommended for large datasets).     10 (only integer values allowed)
$Skip       Skips the first N number of rows. Can only be used in combination with $Top.                                                                                                                                    10 (only integer values allowed)
$OrderBy    Is used to order the result set. Supports asc and desc operator.                                                                                                                                                mySortColumn1 desc,mySortColumn2 asc
$Select     Is used to limit the number of fields returned                                                                                                                                                                  myColumn1,myColumn2,myColumn5
$Filter     Is used to filter the result set. Supports Eq, Ne, Gt, Ge, Lt, Le as comparators in addition to and/or between filter statements.                                                                               myColumn2 Eq English and myColumn3 Lt 4
$Page       When a result set contains more than 1000 rows, a nextPageToken header will be included in the response. Use that value here to go to the next page. If a $Top is provided, pagination will not happen.         JHNraXA9MCYkdG9wPTEwMDA=
REST API endpoints in deliver instances require a REST API web server installed on-premises or in Azure. It's the web server that publishes the data so the URL of the web server will also be the URL where users can GET data from the endpoint.
Viewing the list of web servers
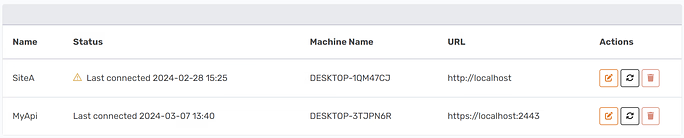
When you install a REST API web server, it automatically tells the Portal that it exists. To view a list of registered web servers, go to Data estate > REST API web servers in the Portal.
On this page, the web servers are listed with the following information:
Name: The name of the server that is listed when you add/edit a REST API endpoint in a deliver instance.
Status: The last connection from the server to the Portal. A warning icon is displayed if that time exceeds seven days.
Machine name: The name of the machine the server is running on.
URL: The URL where the server is serving the data, e.g. 'localhost' if the data is consumed on the same machine.
To refresh the list and see newly added servers, click Refresh.
Editing a web server
To edit a web server, follow the steps below.
In the TimeXtender Portal, go to go to Data estate > REST API web servers
Click the Edit button in the Actions column in the row of the server you want to edit.
In the Edit REST API web server modal, type a new Name and/or URL.
Click Update. The settings will automatically be applied to the server the next time it updates its configuration.
Deleting a web server
You can delete a REST API web server that are not in use by a REST API endpoint. However, the server will not be uninstalled from the machine it is running on, and if it is still running, it will be added to the list again the next time it connects to the Portal.
To delete a web server, follow the steps below:
In the TimeXtender Portal, go to go to Data estate > REST API web servers
Click the Delete button in the Actions column in the row of the server you want to delete.
In the Delete REST API web server modal, click Delete.
Installing a REST API web server on-premises
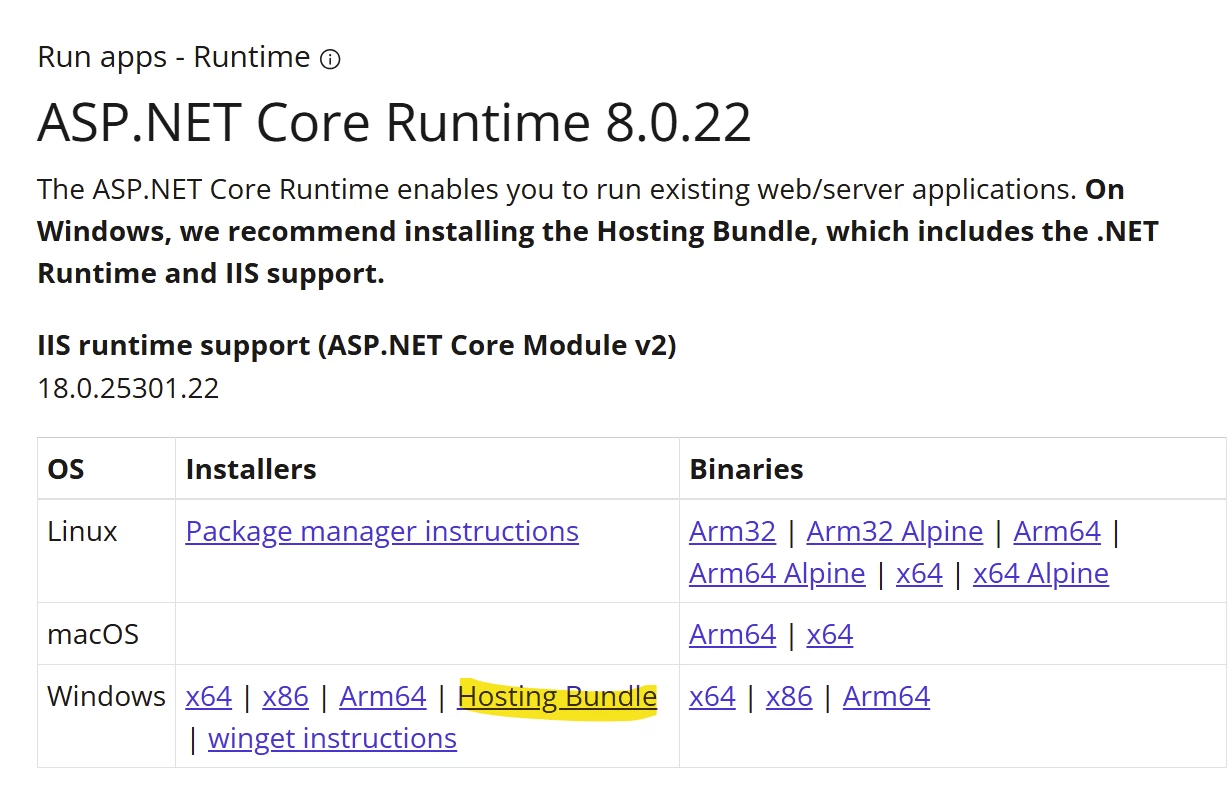
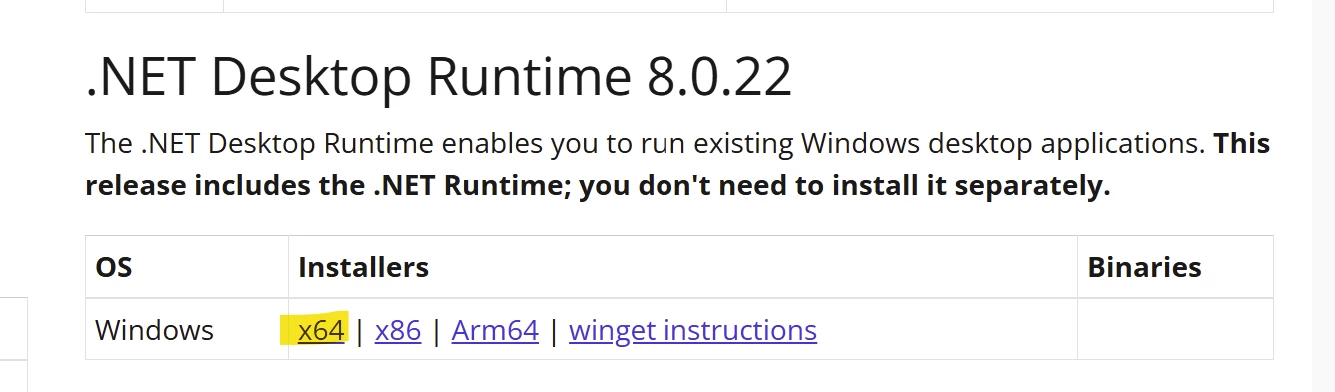
When you want to install a REST API web server on a machine, first ensure that the machine has the following prerequisites installed:
Then download and install the configuration tool. In the TimeXtender Portal, go to go to Data estate > REST API web servers and click Download. Open the file and follow the steps in the installation wizard.
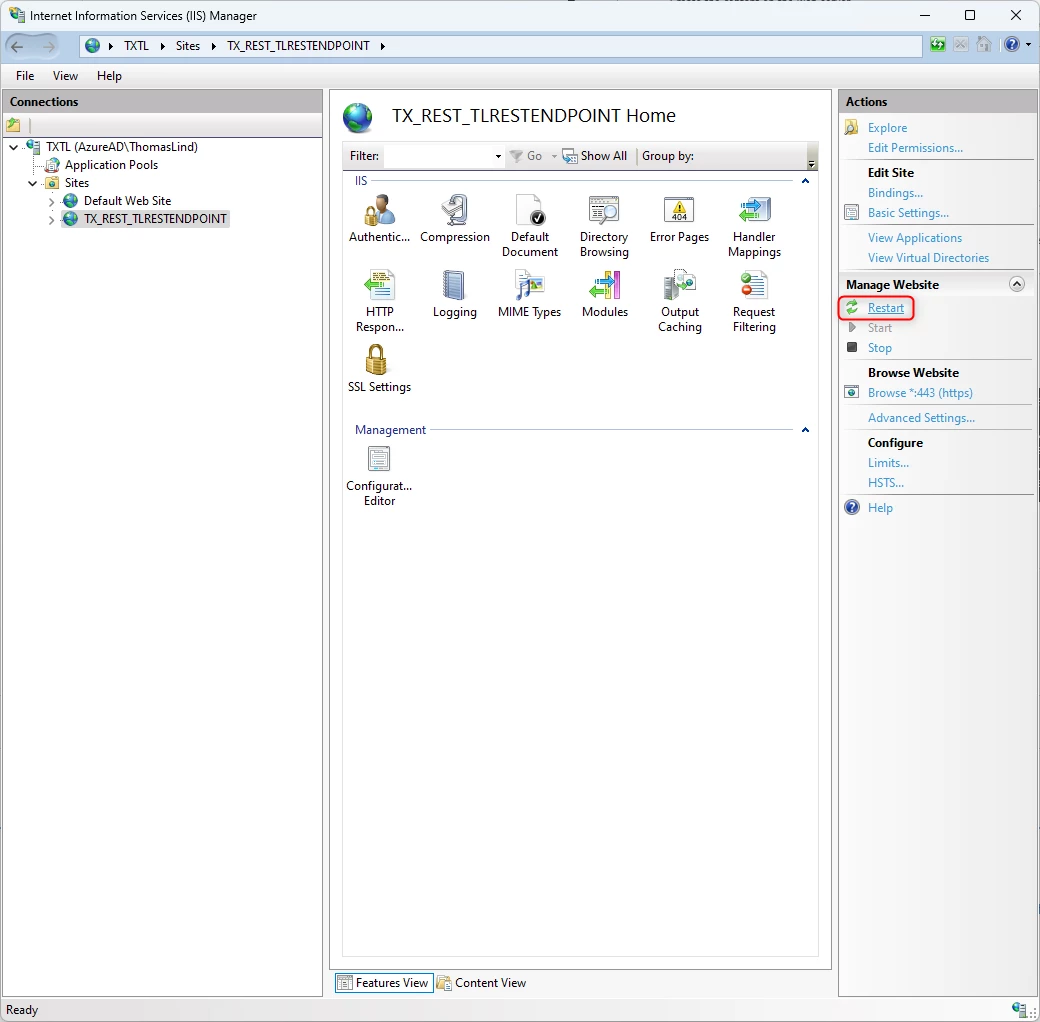
Configuring a REST API web server
Open up the TimeXtender REST API Web Server Configuration. If you are creating a new web server, make sure the Create a new web server is checked. If you are editing an existing, make sure Edit this web server is selected and make a choice in the dropdown. If you need to use a proxy to connect to the Internet, check the checkbox for that. Click Next.
If you are using a proxy, configure your proxy settings, otherwiseclick the Sign In button to sign in. Click Next.
Enter a Name and URL (the URL for your REST API web server). The name is used to identify the web server in the Portal and it also becomes the IIS site name (with TX_REST_ as a prefix). Click Next.
Choose the physical path for the IIS site, the protocol used (http or https) and the port. If you choose https, you must also choose a SSL certificate to use. Click Next.
Review the settings and click Save.
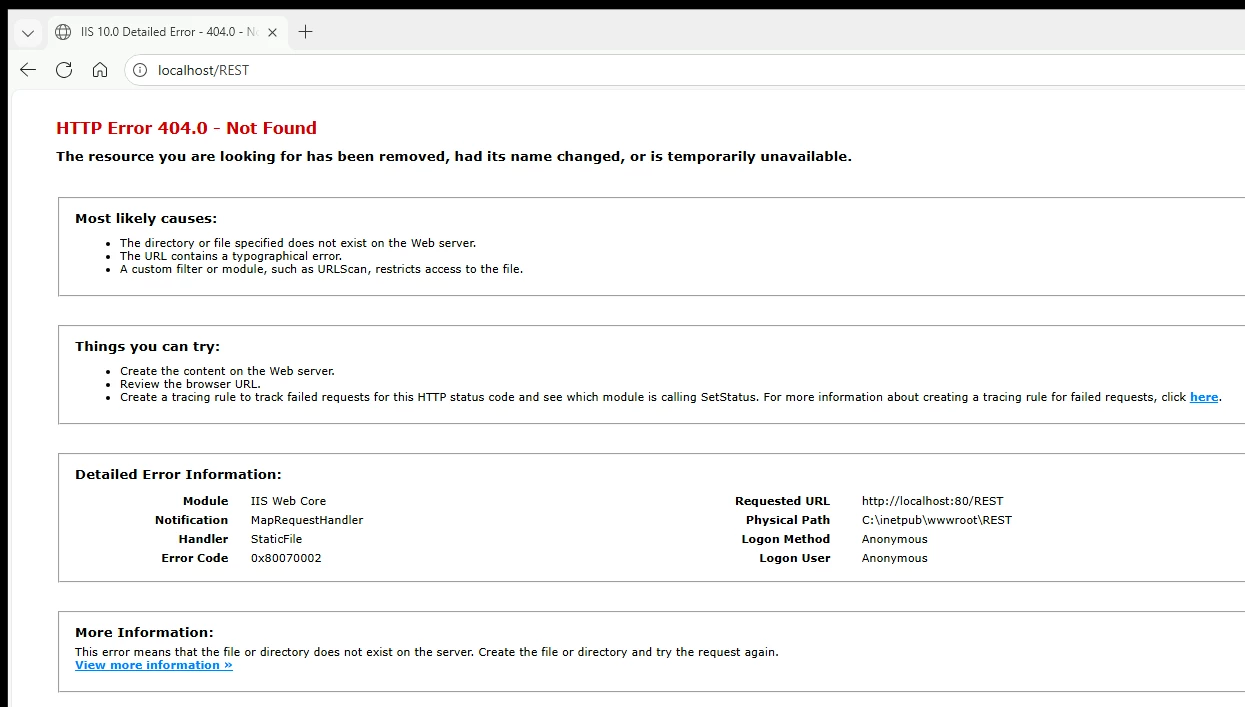
Troubleshooting
If you get an error similar to this after setting it up.
Be sure to check that you installed the correct ASP.NET Runtime Bundle and .NET Desktop Runtime programs.
You can try to install it again, or a newer version of the 8.0.x.x releases.
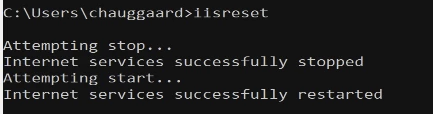
Afterwards, open cmd as a Admin and run the following command iisreset.
Great article and really helpful! One question, is it also possible to add multiple tables to the endpoint and apply different security settings to each different table?
I seem to remember having gotten this question before.
There is a Role option that is mentioned
Click Enable to block access to users that are not in specific roles. The first role is created for you. Next, fill in the Role field with the name of the role. Click Add to add more roles.
The role is what is applied to the Semantic model. If you add a role where specific users is added, it will block access for those outside this role.
I don’t think it will block all endpoints, but it will be able to filter what content in this endpoint a user in a role can see.