Introduction
It has been discussed in multiple topics here: the question how to deploy semantic layers from TimeXtender to Power BI. As of version 21, this is natively supported. But many organizations are still on version 20 and therefor use Azure Analysis Services (AAS) to deploy their datasets to. While this works fine, AAS is a very expensive service and if you already have Power BI Premium, you already pay for a similar technique called XMLA Endpoints.
Because the techniques behind AAS and XMLA Endpoints are similar, there is a way to directly deploy from TimeXtender 20.10.X to Power BI Premium. This guide explains how.
Disclaimer
Obviously this guide explains a trick. Deploying from TX 20.10.X to Power BI Premium is not supported by TimeXtender and some manual manipulations after deployment are involved. However, it can be used to save costs. In our customer case, we save around EUR 4500 on monthly AAS costs, which is worth the pain of some manual actions.
Ingredients
- TimeXtender 20.10.X
- Power BI Preimium per Capacity/User
- Azure Service Principal (AppID + ClientSecret). Create one as described here.
- Your Azure Tenant ID
- Azure Analysis Services Data Drivers installed. Make sure you install version 15. As of TX 20.10.41, SQL Server 2022 is supported, which may enable the use of the latest driver versions as well.
- Tabular Editor version 2 (optional, free)
Configure Azure Service Principal
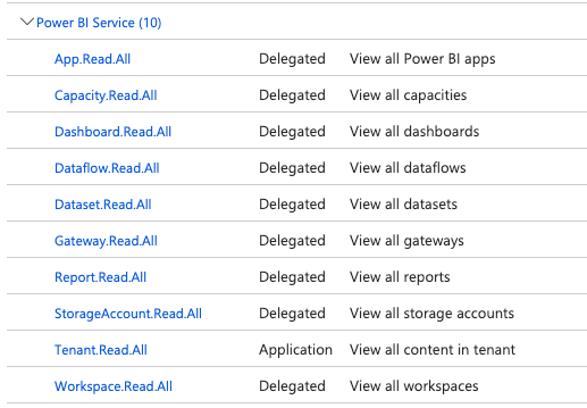
First thing is to assign the Service Principal API Permissions to the Power BI Service. From the Azure Portal, go to your Active Directory, select your principal and choose API Permissions. Add these permissions, which is also described here:
Configure Power BI Service
First step is to allow Service Principals access to Power BI APIs. Go to the Power BI Admin portal and change the settings accordingly:
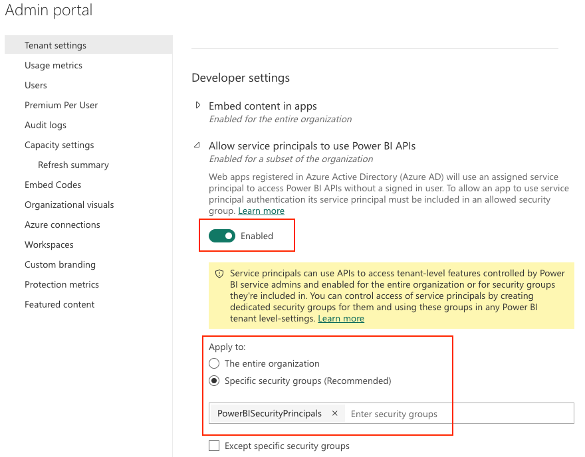
NB: our Service Principal is part of AAD group PowerBiSecurityPrincipals.
Please also see the general article on Power BI Endpoints.
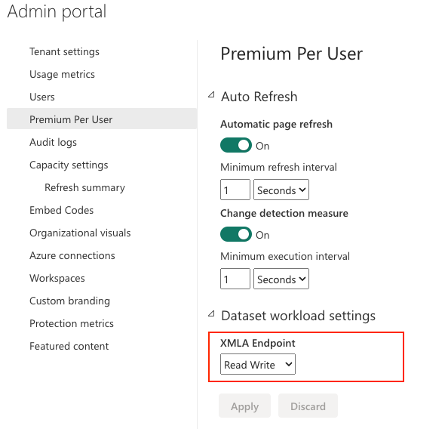
Next, depending on if you are using Premium per User or per Capacity, set XMLA Endpoint to Read Write:
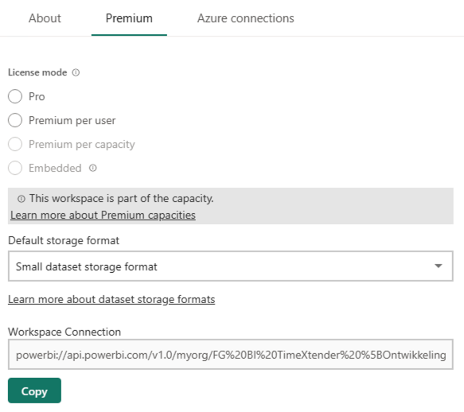
When using Premium per Capacity, make sure that the workspace you’re writing to is part of the capacity (under Workpace Settings):
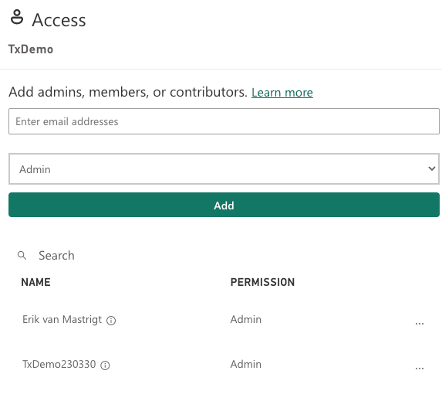
Last, add your Service Principal (or AAD group) as admin on the Workspace
Configure TimeXtender Endpoint
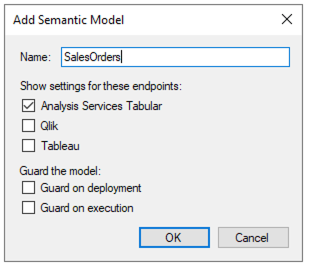
Create a new Semantic Model of type Analysis Services Tabular
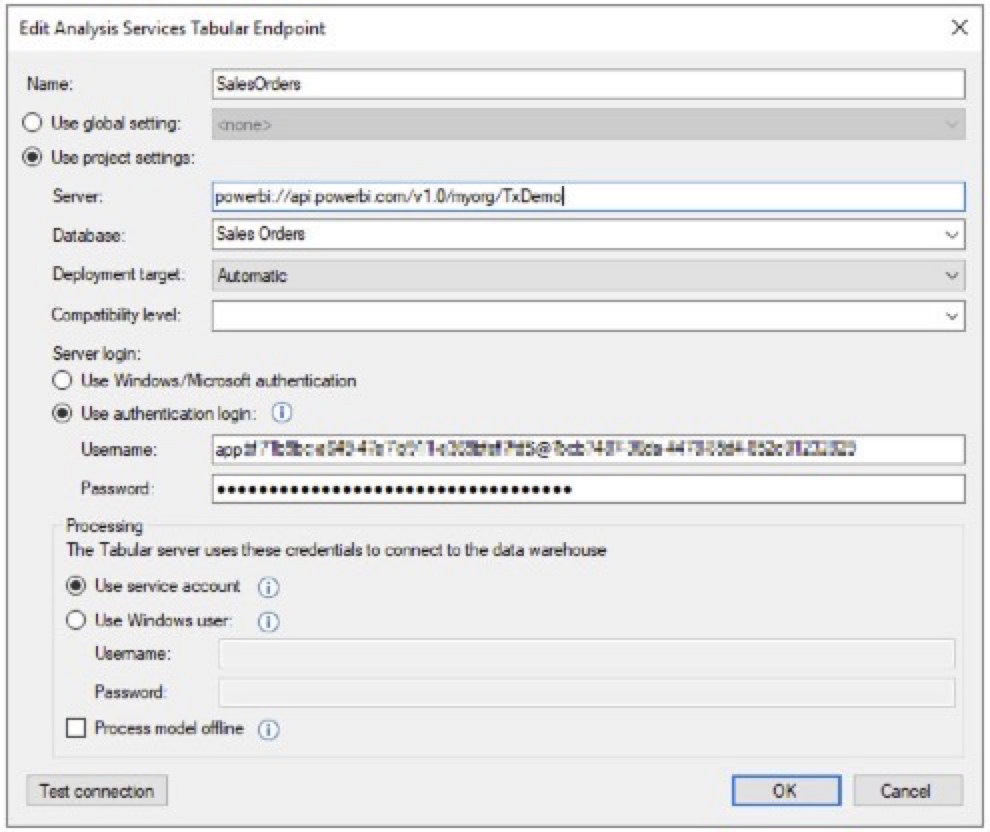
Configure the endpoint accordingly:
- Server: powerbi://api.powerbi.com/v1.0/myorg/<NameOfYourWorkspace>
- Database: provide a name of the dataset
- Use authentication login
- User: app:<ClientSecretID>@<Tenant ID>
- Password: use Value that corresponds to the SecretID
- Leave everything under Processing as it is. Do not check Process model offline
Deploy the endpoint.
NB: Execute won’t work yet. TX cannot deploy database credentials to Power BI Service. Immediate execute after deploy will result in an error. We need to manipulate some settings in the Power BI Service.
Manipulate the dataset in Power BI Service
Go to the Power BI Service and open your Workspace.
Find your dataset and go to the dataset Settings:
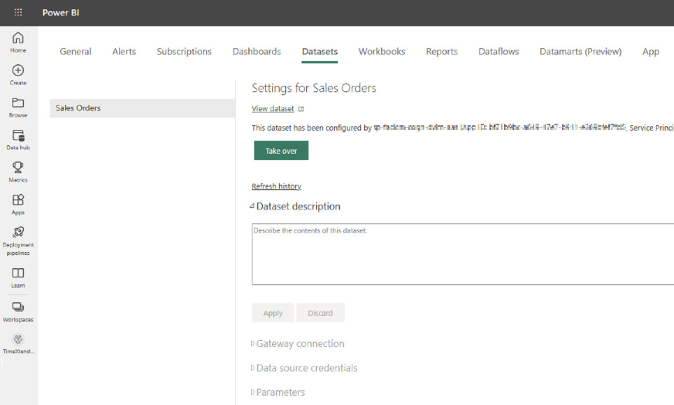
Press Take Over to take over the ownership of the data.
Next, under Data source credentials, click Edit credentials and enter the credentials to your TimeXtender MDW database.
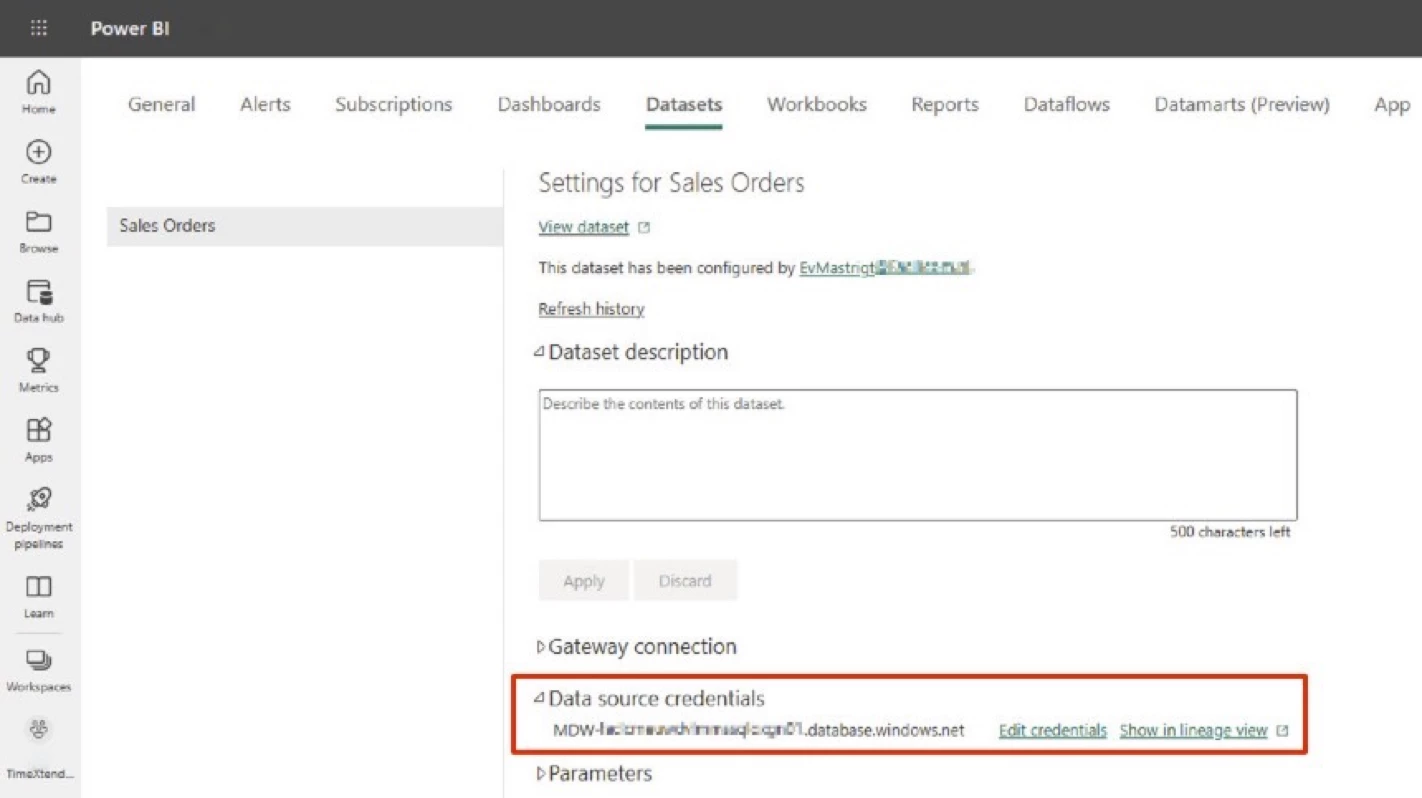
This step is also explained here
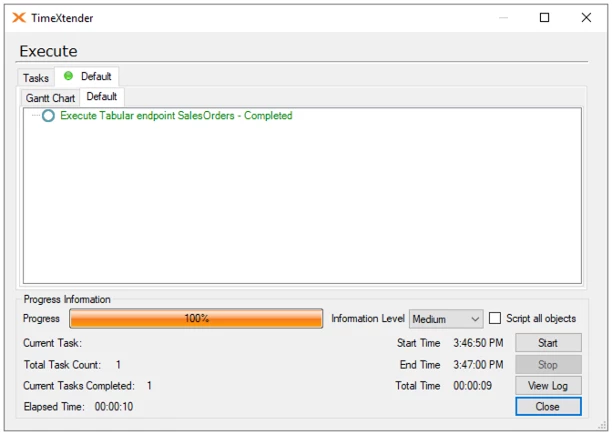
Go back to TimeXtender and perform an execute. It should now finish successfully:
Done!
Some important notes
Roles and RLS
- In case you are using Roles (eg. when using row-level security), you have to create the role in TimeXtender and make sure it’s associated with the Endpoint:
-
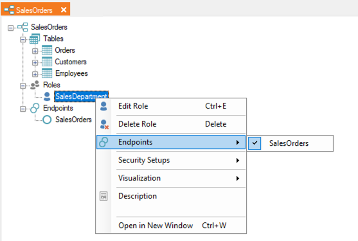
- However, TimeXtender cannot deploy role members to Power BI. You have to assign the members in the Power BI Service
Deploy newer version
- Please note that a new deploy from TimeXtender first DELETES the old dataset and then puts a NEW dataset in the Power BI Service
- This delete action also involves the deletion of related dashboards from the service. Always save a copy of your pbix
- The deletion also means that after each deploy, you have to reassign your role members for row-level security
- At my customer, we use Tabular Editor to download a copy of the model and re-deploy it to a different workspace. Tabular Editor does not delete you existing dataset, but simply updates the structure.
Conclusion
While it is possible to deploy a dataset from TX 20.10.X, I would only recommend to use this hack in order to save some costs on Azure services. Considering the manual actions and risk of loosing dashboards, it might not be a sophisticated solution for your organization.
Please leave any comments, questions or experiences in the comment section.


