

Warning: CData data source providers are no longer supported. We strongly recommend that you use or upgrade to TimeXtender REST data source.
REST Information
A lot of companies stores data or gives access to data via an REST API. There are two setups in general JSON and XML. However there also was a change to allow for CSV data. How these works can be seen in the JSON and XML guides and they can be used to connect to the REST API with no changes to the methods.
Normally you connect to a web page URI with some link of some sort. Like this https://gorest.co.in/public-api/users, but you can also connect directly to a JSON/XML file, though it would be better to use the specific provider for that in that case.
Content
Data source Setup
The first step in setting up a REST provider should always be to click following link.
You have three data types of that the data can be presented in.
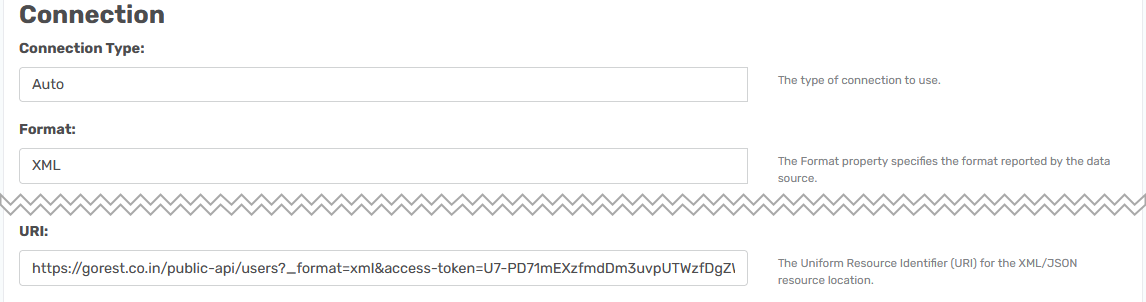
XML
In general it is JSON is the most common, but some XML rest providers exists and more about that in the SOAP section.
To try it you can use this URI https://gorest.co.in/public-api/users?_format=xml&access-token=U7-PD71mEXzfmdDm3uvpUTWzfDgZWsZTxRW1.
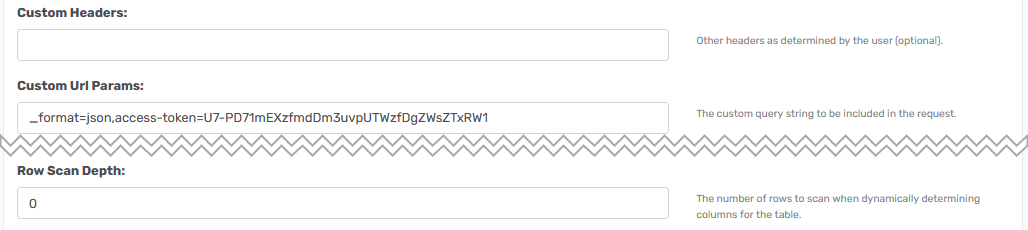
To try another setup you can remove the access token and format to xml the Custom URL Params. The setup will be like so.

- URI: https://gorest.co.in/public-api/users
- Custom URL Params: _format=XML,access-token=U7-PD71mEXzfmdDm3uvpUTWzfDgZWsZTxRW1
- Row Scan Depth:0
Row Scan Depth is used so all the file will be read before the data types is chosen. More is explained in CSV, JSON and XML.
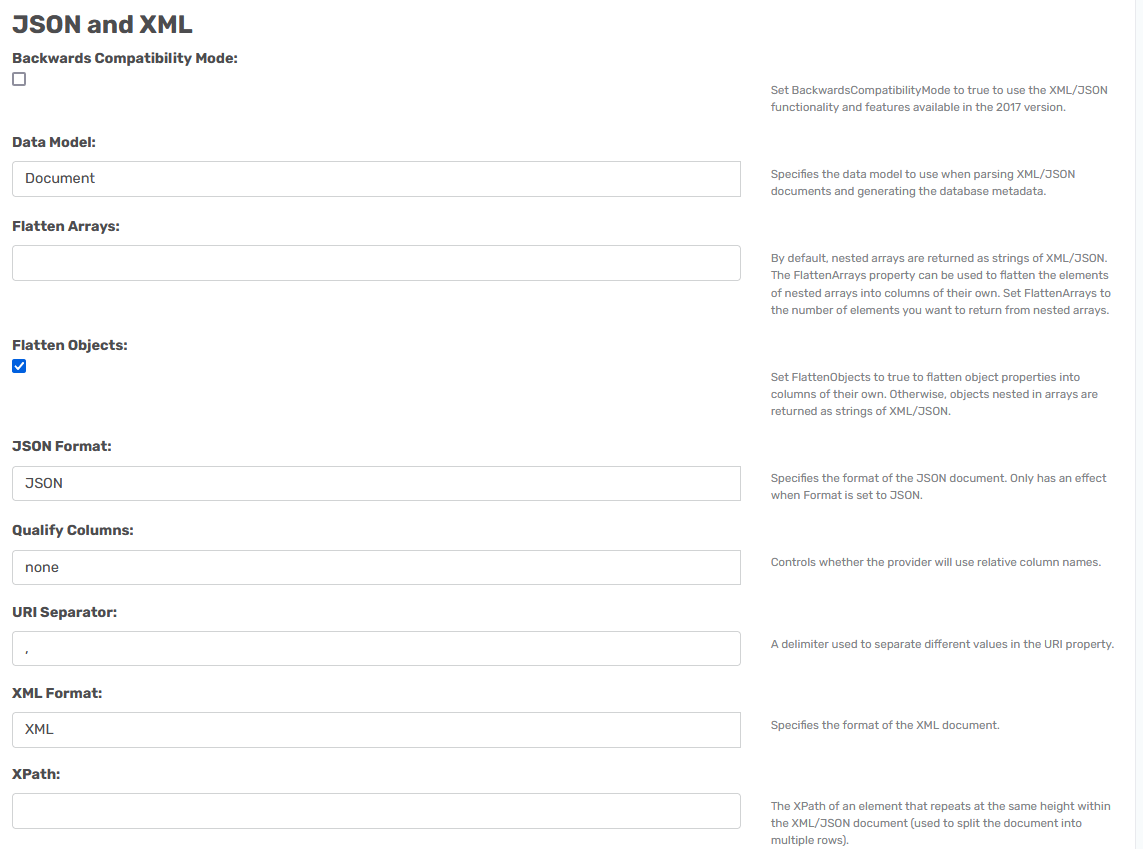
Additionally there is an area in the setup with options specifically for either XML or JSON data, the options are explained in detail in the specific guides.
SOAP
SOAP is a protocol which was designed before REST and came into the picture. The main idea behind designing SOAP was to ensure that programs built on different platforms and programming languages could exchange data in an easy manner. SOAP stands for Simple Object Access Protocol.
You can use SOAP calls in REST, but you will need to use RSD files, so read that guide for more info.
In essence you use the XML format option and then add the SOAP Post call in a generated RSD file.
JSON
Most REST api's use JSON. You can use most of the features also explained in the JSON guide.
So here are a list of good online API's to test on.
- REQRES - Test your front-end against a real API
- GoREST - Online FREE REST API
- dummy - Dummy Rest API example
- fixer.io - Online Currency data
Most of these have more or less the same setup, but done in different ways.
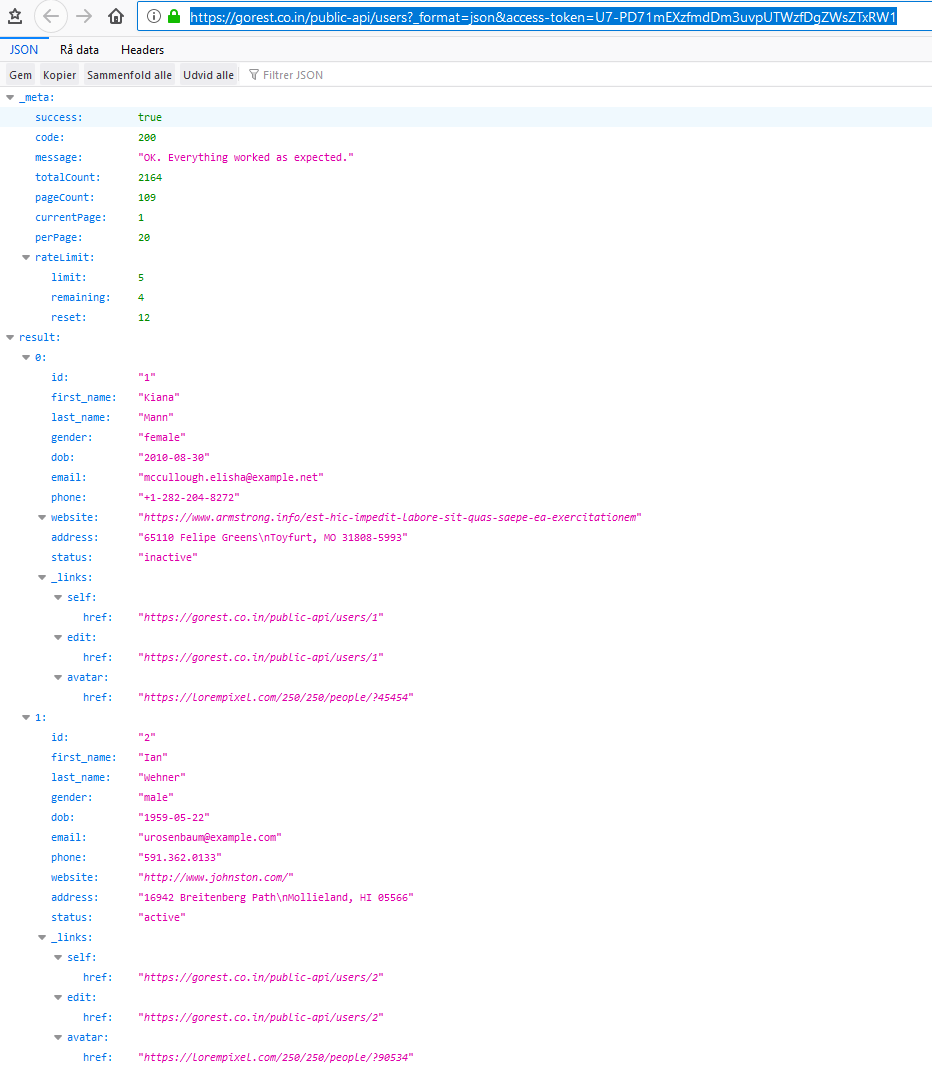
Here below I have gained access to GoRest. Go to the web page to get the access_token necessary. It iis not an requirement, but for training purposes it is a good option to use.
Here is the URI and its contents
Here is how I set it up.
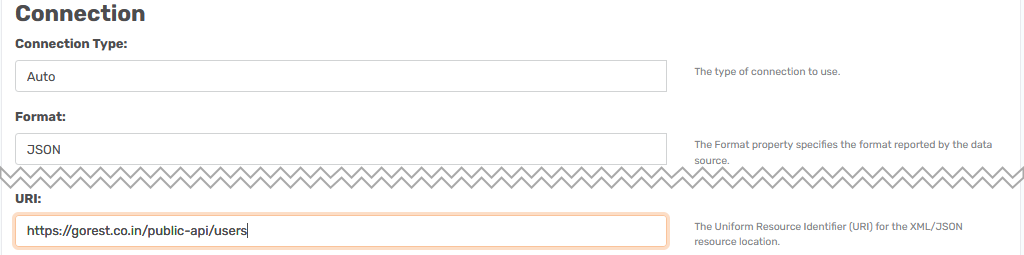
- URI: https://gorest.co.in/public-api/users
- Custom URL Params: access-token=U7-PD71mEXzfmdDm3uvpUTWzfDgZWsZTxRW1
- Row Scan Depth:0
I added the access token to the Custom URL Params field, but you can add the complete string to the URI field as well. You can add as many options as you have, you just need to know the code and set it equal to something, e.g. page=5 you just need to split it with a , sign.
CSV
This is a new option. Essentially you can connect ot CSV files instead of XML or JSON. There is a specific area dedicated to this.

This FMT field will need to be changed if the file do not use the default delimiter.
Additional info can be found in the CSV guide.
Getting access to the data
After this you have the data source template. To use it you can look at the following guides
How to update the providers or see the version of the ones you use, see this guide.
Using a Custom Header
Sometimes it is a requirement to have some headers set to gain access. You can state them in that field. A common one is to set the text to be json with the following command.
Accept:application/json

It is also commonly used to gain access with a bearer token like so.
Authorization:Bearer <token id>

How it is stated is really important, so a misplaced blank space or incorrect case of a character will make it not work.
In some instances you would want to add more than one the current option in this field is to add \r\n Like so:

Then you can add as many headers as you need.
Using Custom URL Parameters
If the URL you put in the URI field has a ? and some parameters after this, like so:
http://gorest.co.in/public-api/users?_format=json&page=1&per_page=100
Then you can move those after that sign into the custom URL params field. The difference is that you need to use a comma between each parameter instead of a & sign. Like so.

It will generate the same get URL when the call is being done.
Generating an RSD file
There now is a specific RSD guide available that shows all possible methods of doing this.
OAuth Authentication
The following is based on what can be found here Using OAuth. There are some shared things to know. It will become a bearer token, which can also be used in a different nondynamic way as a Custom Header as you can see in the section about that.
The fields you use depend on what grant type you want to gain access with. Some fields will be used for all of these.
The three methods to connect with are controlled by the OAuth Grant Type option.
For the following options I am using the Graph API to pull out information from our Azure AD.
I need an application to do this and I have generated two and a secret for both.
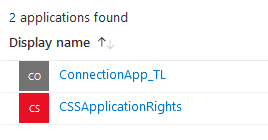
The ConnectionApp_TL will be used for CODE and the CSSApplicationRights will be used for CLIENT.
The reason is that the one I will use for CODE has Delegated rights and the one for CLIENT has Application rights.
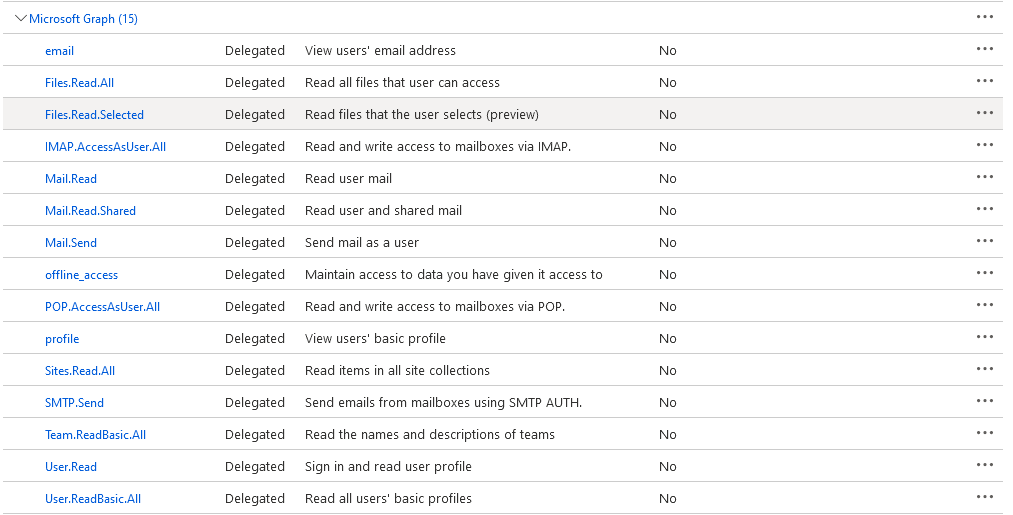
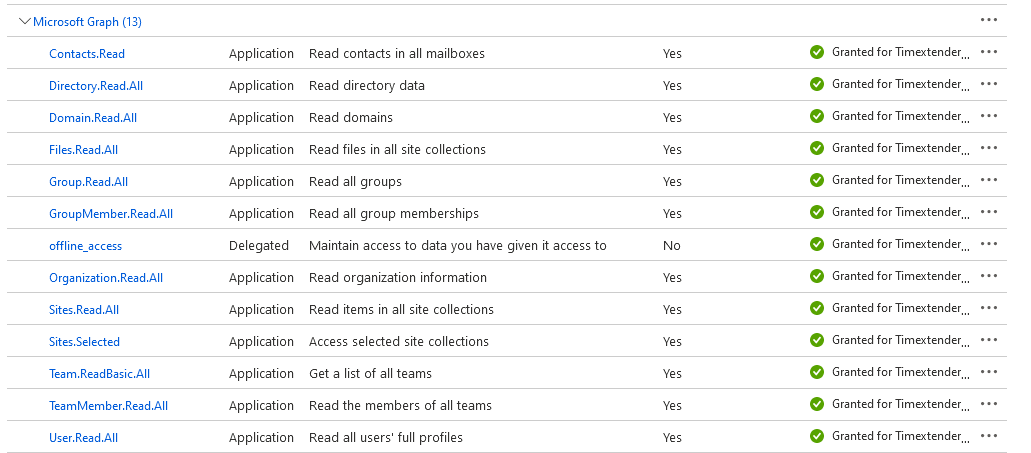
This decides what I am allowed to see with my app.
For all three I also need the two following fields set.
Auth Scheme needs to be set to OAuth.

And the URI needs to point at this. For more suggestions check this link to https://developer.microsoft.com/en-us/graph/graph-explorer
URI set to https://graph.microsoft.com/v1.0/users

Code
The Code option is the default method and the most common one. It requires the following.
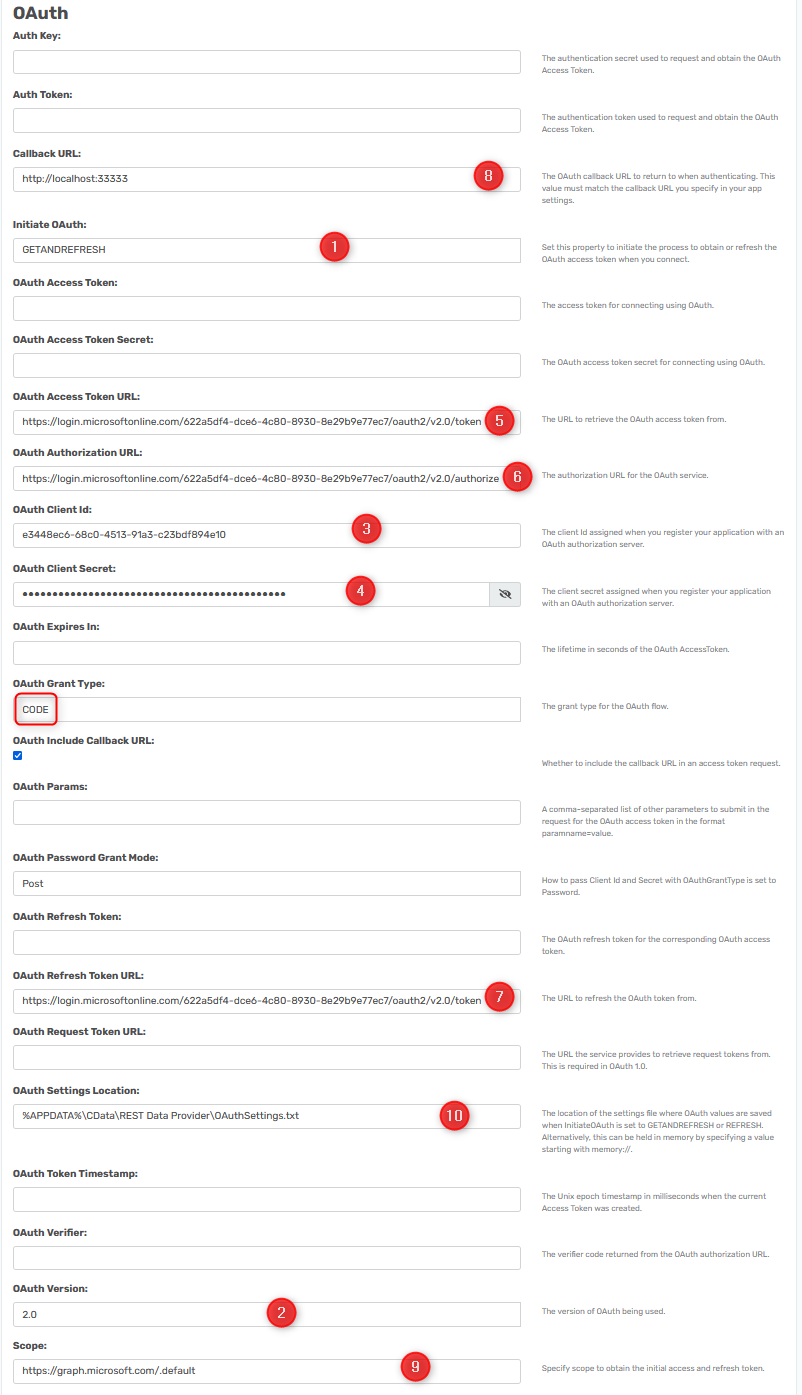
- Initiate OAuth: Set to GETANDREFRESH. It can later on be changed to REFRESH.
- OAuth Version: Set to 2.0 as it is the version we use.
- OAuth Client ID: Set to the id of the app.
- OAuth Secret ID: Set to the secret of the app.
- OAuth Access Token URL: The format is https://login.microsoftonline.com/<tenantID>/oauth2/v2.0/token
- OAuth Authorization Token URL:The format is https://login.microsoftonline.com/<tenantID>/oauth2/v2.0/Authorize you can read more about it here https://learn.microsoft.com/en-us/azure/active-directory/develop/v2-oauth2-auth-code-flow
- OAuth Refresh Token URL: The format is https://login.microsoftonline.com/<tenantID>/oauth2/v2.0/token it is set to the same as the Access token URL field as it does the same thing.
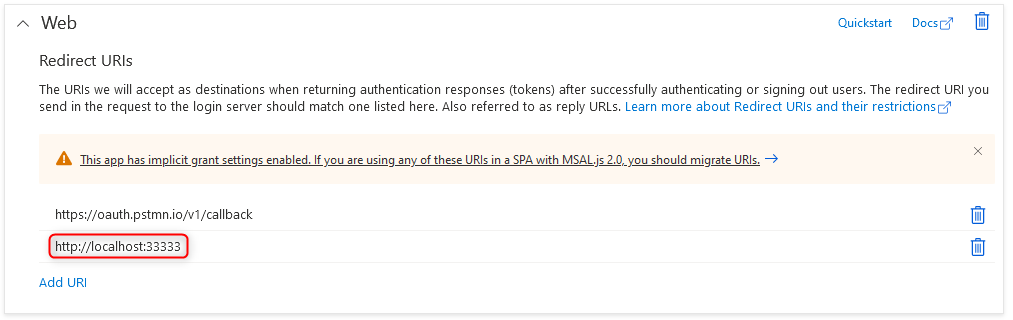
- Callback URL: This is the URL you set in the app. CData always suggest to use http://localhost:33333 so I use it as well.
- Scope: Microsoft requires this field to be set with a right such as read.users for connecting to this. There is a lot of options you can read about here https://learn.microsoft.com/en-us/azure/active-directory/develop/scopes-oidc. Due to what I connect to and because I want to use the rights of my app I set it to https://graph.microsoft.com/.default
- OAuth Settings Location: This is the field where the location of the OAuth Settings file is set. By default it will be stored in the folder of the user that authenticates the OAuth call. The tokens will be stored in the OAuthSettings.txt file, as encrypted data, after you click on the Authorize OAuth button.
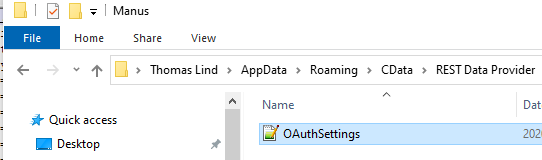
Consider overwriting the default location of the file with a specified location. This will make it work better when using scheduled execution and multiple users. If a new user connects to the file it will look at this persons AppData folder and locate no settings file if it is not specified with a fixed path. Be sure users are allowed to change the content of this folder so other users can update the tokens.
Client
The Client Authentication method requires some options set, though seemingly the same. It doesn't require the Authorization Token URL. The main part of this is that the app has the proper rights as explained above. Here I am using the CSSApplicationRights app.
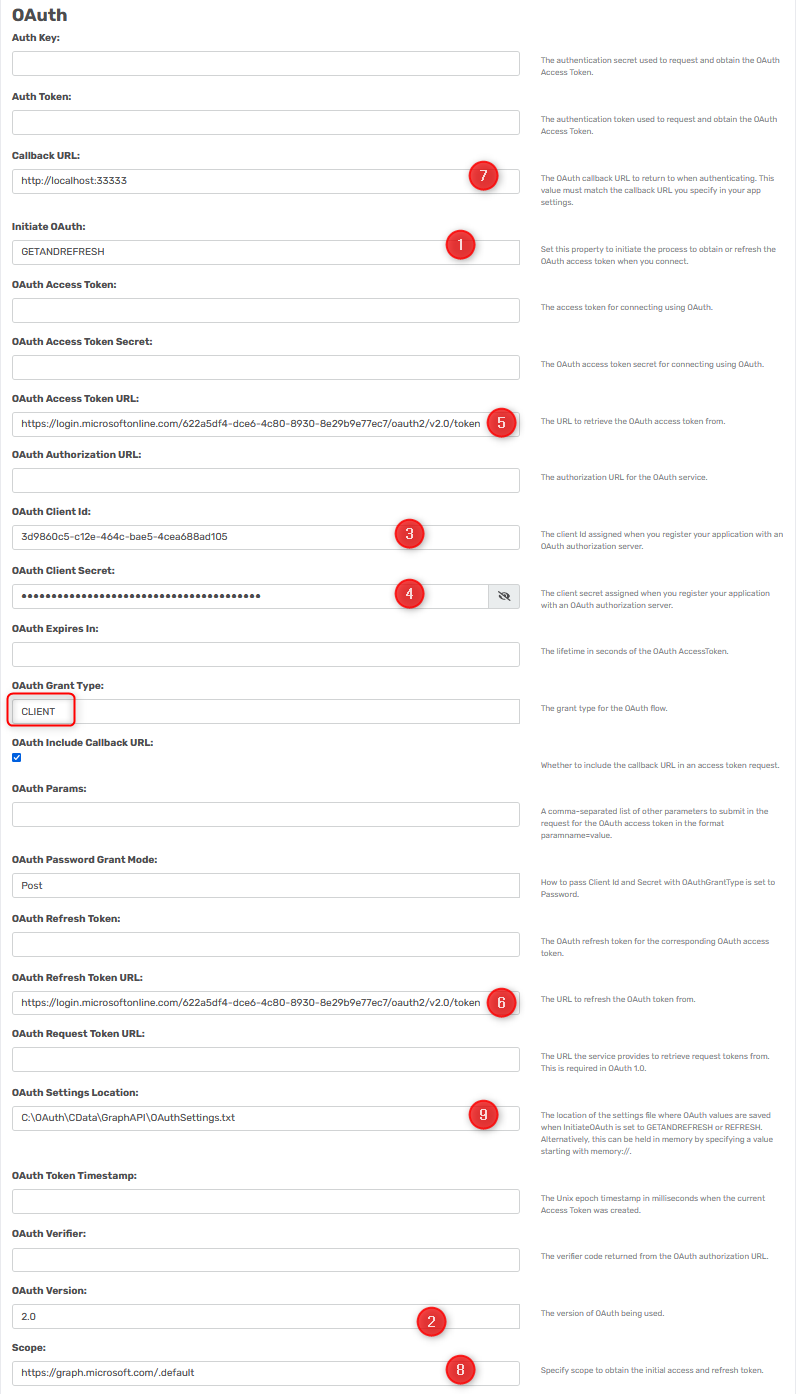
- Initiate OAuth: Set to GETANDREFRESH. It can later on be changed to REFRESH.
- OAuth Version: Set to 2.0 as it is the version we use.
- OAuth Client ID: Set to the id of the app.
- OAuth Secret ID: Set to the secret of the app.
- OAuth Access Token URL: The format is https://login.microsoftonline.com/<tenantID>/oauth2/v2.0/token. You can read more about the client flow here https://learn.microsoft.com/en-us/azure/active-directory/develop/v2-oauth2-client-creds-grant-flow
- OAuth Refresh Token URL: The format is https://login.microsoftonline.com/<tenantID>/oauth2/v2.0/token it is set to the same as the Access token URL field as it does the same thing.
- Callback URL: This is the URL you set in the app. CData always suggest to use http://localhost:33333 so I use it as well.
- Scope: Microsoft requires this field to be set with a right such as read.users for connecting to this. There is a lot of options you can read about here https://learn.microsoft.com/en-us/azure/active-directory/develop/scopes-oidc. Due to what I connect to and because I want to use the rights of my app I set it to https://graph.microsoft.com/.default
- OAuth Settings Location: This is the field where the location of the OAuth Settings file is set. By default it will be stored in the folder of the user that authenticates the OAuth call. The tokens will be stored in the OAuthSettings.txt file, as encrypted data, after you click on the Authorize OAuth button.
Consider overwriting the default location of the file with a specified location. This will make it work better when using scheduled execution and multiple users. If a new user connects to the file it will look at this persons AppData folder and locate no settings file if it is not specified with a fixed path. Be sure users are allowed to change the content of this folder so other users can update the tokens.
Regarding parameters you will at times have to add more than one type. You can also add the scope as a OAuth Param. For example you could have to add a scope and a state parameter. In that case it would look like so scope=users.read,state=top. You split the individual types with an , sign and set the type equal an value.
Password
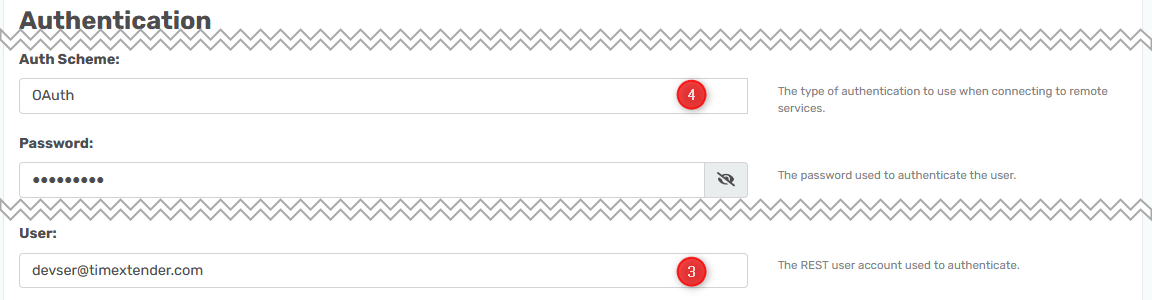
Finally there also is an Password method. It is similar to the others, in that it requires an Access Token URL and an Refresh Token URL, the difference is that it uses an User and Password instead of client and secret. Notice that these fields are in the Authentication section, not in the area of the other OAuth fields.
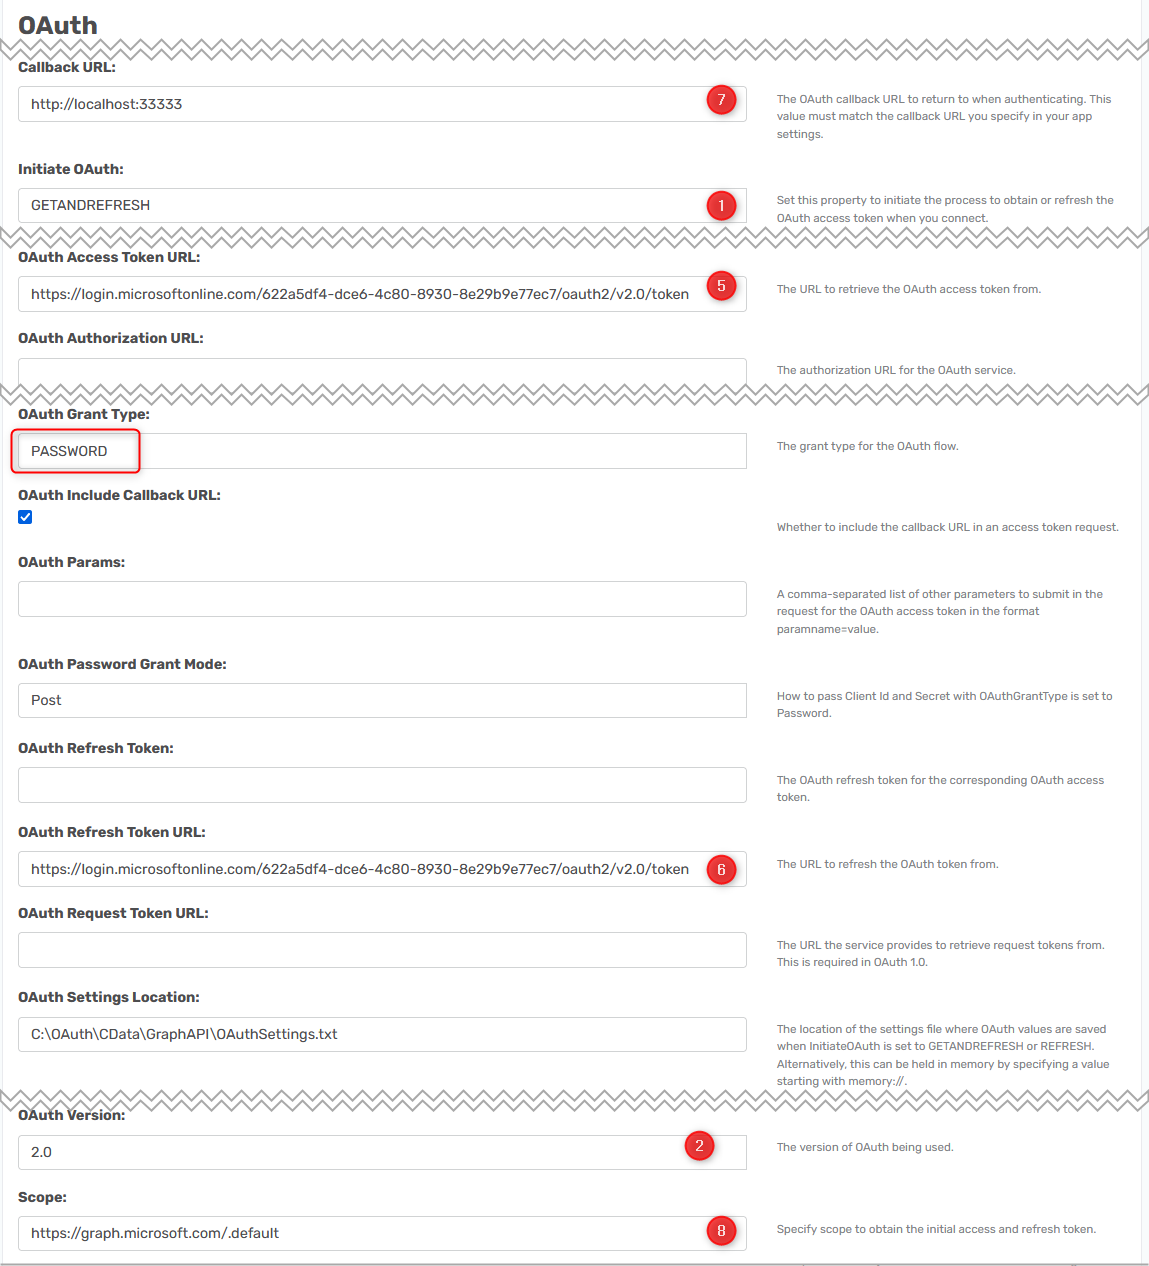
- Initiate OAuth: Set to GETANDREFRESH. It can later on be changed to REFRESH.
- OAuth Version: Set to 2.0 as it is the version we use.
- User: Set to the user authenticating the call.
- Password: Set to the password of the user authenticating the call.
- OAuth Access Token URL: The format is https://login.microsoftonline.com/<tenantID>/oauth2/v2.0/token. You can read more about the password flow here https://learn.microsoft.com/en-us/azure/active-directory/develop/v2-oauth-ropc
- OAuth Refresh Token URL: The format is https://login.microsoftonline.com/<tenantID>/oauth2/v2.0/token it is set to the same as the Access token URL field as it does the same thing.
- Callback URL: This is the URL you set in the app. CData always suggest to use http://localhost:33333 so I use it as well.
- Scope: Microsoft requires this field to be set with a right such as read.users for connecting to this. There is a lot of options you can read about here https://learn.microsoft.com/en-us/azure/active-directory/develop/scopes-oidc. Due to what I connect to and because I want to use the rights of my app I set it to https://graph.microsoft.com/.default
- OAuth Settings Location: This is the field where the location of the OAuth Settings file is set. By default it will be stored in the folder of the user that authenticates the OAuth call. The tokens will be stored in the OAuthSettings.txt file, as encrypted data, after you click on the Authorize OAuth button.
Consider overwriting the default location of the file with a specified location. This will make it work better when using scheduled execution and multiple users. If a new user connects to the file it will look at this persons AppData folder and locate no settings file if it is not specified with a fixed path. Be sure users are allowed to change the content of this folder so other users can update the tokens.
Authorize OAuth
Once this has been setup and the data source have been created in the portal, you can create it as a datasource. Once created you will have to authenticate it by clicking on the Authorize OAuth button.

If you use CODE as your grant type a web browser will open and you will have to log in as an user. Following this you will likely have to accept some access settings and a success webpage should be shown.
If you use CLIENT as your grant type it will not open any menus, but should instead just give a authentication successful message.
Following this, you can change the Initiate OAuth to REFRESH and it will automatically update the tokens in the file when they are about to expire.
Advanced features
Automatically getting the correct data types
As standard CData will scan the first 100 rows and determine what data types these fields are. Sometimes this gives an error because the 101 row contained a longer string than was present in the previous rows.
The solution simply is to change the Row Scan Depth field to a higher number. If you set it to 0 it will parse the whole file. Also in regards to JSON/XML files, this field doesn't only solve the issue of data type, but also what tables are available. If the file contains more than 100 rows in total these will not be added. So a good idea is to work out what the maximum amount of rows that are contained in the file and then add that or set it to 0 to be sure.
More about this is explained in the CSV, JSON and XML guides.
After you adjust the Row Scan Depth and you still have issues with data types, you can set the Type Detection Scheme field to None. This will prevent the provider from attempting to detect the data types and simply bring in every field as a VarChar.

Parsing hierarchical data
Is exactly the same as in JSON or XML respectively. So you use the Data Model feature to choose what should be done with the data.
Using JSON Format
This is the same as in the JSON guide, the only difference is that you need to manually type in LDJSON to the field to use that option.
Pagination
There is now a specific RSD and pagination guide here
Creating and using RSD files for CData providers
